
Develop Locally
Test your creation in your system
Develop and Test a WebAR Experience Locally
The license purchased for a particular domain can only be used when the WebAR SDK and the developed AR experience is hosted on a HTTPS webserver having the same domain name. But when developing and testing an AR experience, it would be inconvenient to republish to the Remote HTTPS webserver after every code change.
Do not worry. WebAR SDK's Developer mode allows you to run and test your AR experience in your local HTTPS server having a private IP address as the domain name and provided you have a Valid License purchased from Blippar.
There are many ways to setup a local HTTPS server using a Self-Signed SSL Certificate in a development environment. This section explains setting up a local development environment using Visual Studio Code.
Step 1: Find the IP Address of your PC
Note down the IP address of your PC which is connected to a LAN/WiFi network. You will be setting up an HTTPS server that will be accessed using this IP address. The following instructions are provided with A-Frame(Surface Tracking) as the example rendering framework. The goal is to access the WebAR SDK's A-Frame example via the local HTTPS server from a mobile browser using the following URL:
https://<your_PC_ip_address>:5500/aframe/surface.html
As an example, if your PC's IP address is
192.168.68.105, this will be the address used in our example setup. It is important to replace192.168.68.105with the actual IP address of your PC when you follow the steps below.Dynamic IP Address: Keep in mind that if your PC reconnects to the router, the IP address may differ from the one you've noted due to DHCP assignments. If the HTTPS server becomes inaccessible at
https://<your_PC_ip_address>:5500/aframe/surface.html, you'll need to check and update the IP address accordingly.Assigning a Static IP Address: To avoid the inconvenience of a changing IP address each time your PC connects or reconnects to your network router via LAN/WiFi, consider assigning a static IP address to your PC. This can be accomplished through your router's settings; consult the router's user manual for detailed instructions on this procedure.
The following instructions guide you on how to find the IP address of a MacBook or Windows laptop that's connected to a WiFi network, which is also shared with your mobile phone. For operating systems not listed here, similar steps can be followed to identify the IP address.
Identifying IP Address on Connected Devices
MacBook:
Via System Preferences:
Click Apple logo > "System Preferences" > "Network."
Select WiFi; IP address is under "Status."
Via Terminal:
Open Terminal (Applications > Utilities).
Type
ifconfig, press Enter.Find "inet" under "en0" or "en1" for IP.
Windows:
Via Settings:
Open Settings > "Network & Internet" > Wi-Fi.
Click on network name > see "IPv4 address" under "Properties."
Via Command Prompt:
Press Win + R, type
cmd, press Enter.Type
ipconfig, press Enter.Look for "IPv4 Address" under "Wireless LAN adapter Wi-Fi."
Step 2: Download the WebAR SDK
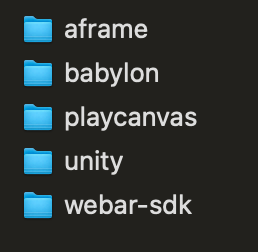
Upon acquiring a license, proceed to download the WebAR SDK. Extract the contents of the zip file into a designated folder. Inside, you will find several directories as follows:
aframe - Features A-Frame examples for surface, marker, and face tracking.
babylon - Offers Babylon.js examples for surface and marker tracking.
playcanvas - Contains PlayCanvas setup guides for surface and marker tracking. Fork projects from the links provided, replace sample license keys and marker IDs with valid ones from the Blippar hub, and publish.
unity - Provides a setup guide for Unity integration. Follow the Blippar Unity Integration for detailed instructions. No examples included.
webar-sdk - Includes the minified script
webar-sdk-<version>.min.jsfor WebAR development.
Step 3: Open a WebAR Project
Install Visual Studio Code (VSC)
Download Visual Studio Code from this link and Install it on your Windows/Linux/macOS PC.
After installation is complete, open a Visual Studio Code application to see an empty Project.
From the empty Project opened in VSC,
Click the Explorer icon on the left panel
Click the Open Folder Button
After navigating to the unzipped WebAR SDK folder, click the Open Button
Step 4: Open a Terminal in VSC
A Self-Signed SSL Certificate can be generated in many ways. Here we use the mkcert tool to generate a Self-Signed SSL. If you use any other methods to generate a Self-Signed SSL, make sure the IP address of your PC is used as the domain name of the Certificate.
In VSC, go to Terminal -> New Terminal to open a Terminal console in the bottom panel.
The mkcert tool can be installed from the package manager of the corresponding OS platform. So first make sure the platform's package manager is installed.
On Linux & Windows: Install package manager
Follow the instructions in this page and install the package manager of your OS platform which is needed to install the mkcert tool and go to the next Step.
On macOS: Install brew package manager
The brew package manager is needed to install the mkcert tool. If brew is not already installed, type the following command in the Terminal console to install brew first.
Skip this command if you have already installed brew.
While running the command, it will ask for the `sudo` access password.
Enter your MacBook login password for installation to complete successfully. Also make sure there are no errors at the end.
Step 5: Install the mkcert tool
On Linux & Windows:
Follow the instructions in this page and install the mkcert tool using the package manager of your OS platform and then go to the next Step.
On macOS:
In the Terminal console, type the following command to install the mkcert tool.
Step 6: Create the Self-Signed SSL Certificate
In the terminal, go to home directory and create a new directory named ssl and create the SSL certificate in this folder.
Create ssl directory
Run the following commands inside the ssl directory to generate the Self-Signed Certificate.
Note: In the second line of the above command, make sure to replace 192.168.68.105 with the ip address of your PC.
The above command will generate two files: a certificate and a key.
192.168.68.105.pem - Certificate
192.168.68.105-key.pem - Key
Note:
The actual certificate file names will be different as they will be based on the IP address of your PC
Dynamic IP address: When your PC connects/reconnects to your Home Network Router via LAN/WiFi, its IP address could change i.e it would be different from what you have noted down in Step 1. So you have to repeat Step 1 and Step 6 whenever you start your PC or your mobile browser fails to access HTTPS server via https://<your_PC_ip_address>:5500/example/index.html url
Static IP address: To avoid the change of IP address allocated by your Home Network Router to your PC, check your Router user manual to see how to assign a static IP address permanently.
On Windows:
Note down the full/absolute path of the certificate and key files which will be needed in the coming steps.
On macOS & Linux:
Type the following command inside ssl folder to see the certificate and key files with full/absolute path which will be needed in the coming steps.
Step 7: Install a Live Server Extension in VSC
Live Server is an easy to setup and simple HTTPS server which will server your WebAR application.
In VSC,
Click the Extensions icon on the left panel.
Search for Live Server.
Click Install to install the extension.
Step 8: Configure the HTTPS Server
In VSC,
In the left Explorer panel, click in the empty space below the example folder
Click the New Folder icon to create a folder named .vscode
Inside the .vscode folder click the New File icon to create a file named settings.json
Open the settings.json file and copy paste the following json content
Copy paste the full/absolute path of the Self-Signed SSL key file generated in Step 6 and enter it as the string value of the "key" parameter as in the following json file
Copy paste the full/absolute path of the Self-Signed SSL certificate file generated in Step 6 and enter it as the string value of the "cert" parameter as in the following json file
Note:
In points 5 and 6 above:
Replace <user_name> with your actual system user name you see on your terminal.
Replace 192.168.68.105 with the actual IP address of your PC or use the actual certificate and key files name created from Step 6
Step 9: Start the HTTPS Server
In VSC,
Open the example/index.html file and enter a valid License key purchased from Blippar.
On the bottom right corner of VSC, click Go Live to start the HTTPS server and look for status changing to Starting... and the Port:5500
Open Safari/Chrome on your PC and type the following URL for surface tracking in A-Frame:
Note:
Replace 192.168.68.105 with the actual IP address of your PC.
Append port 5500 to your IP address as this is the port number configured in the .vscode/settings.json file in Step 8
For different rendering engines like Babylon, adjust the URL accordingly.
On the browser you can see the WebAR SDK desktop page with a QR code and a Green coloured banner on top displaying DEV MODE.
Step 10: Experience WebAR in a Mobile Browser
On your mobile phone,
Make sure it is connected to the same LAN/WiFi network as your PC and it is not behind any VPN or Gateway.
Open the Camera app and Scan the QR code displayed from Step 9
On an Android phone, click the Lens icon to scan the QR code
Click the url scanned from the QR code to open it in the Android Chrome or Safari browser
When loading a site from a self-signed certificate for the first time, you may see a Your connection is private warning
On Android Chrome, click Advanced and then click Proceed to 192.168.68.105(unsafe)
Now you can see the WebAR experience loaded with a Green coloured banner on the top displaying DEV MODE.
WebAR SDK Examples
Refer various example AR creations in the GitHub Library