Manage Your Licenses
Learn more about views and license management
Introduction
WebAR SDK allows you to manage your own license and views. This enables you to upgrade your plans as required, without any hassles. You can easily manage your license from the HUB. Let us understand the various types of licenses available and the feature inclusion with each license.
Types of Licenses
Free Trial License
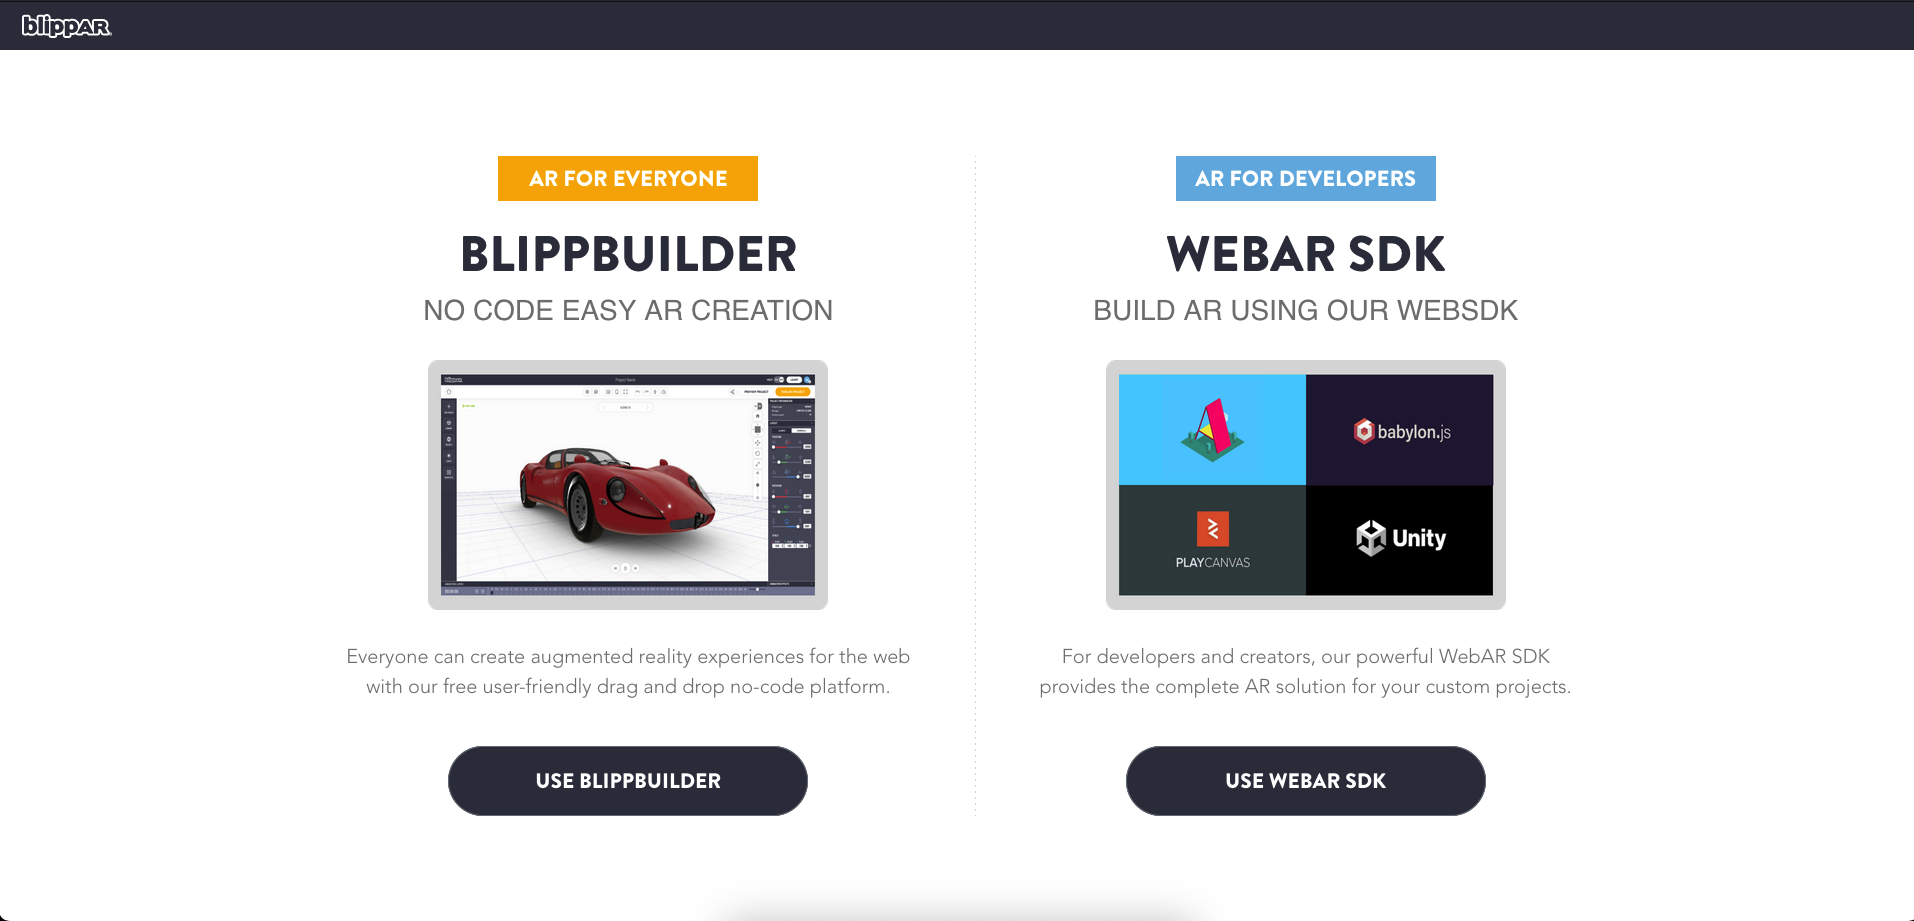
Click the icon 'Use WebAR SDK' to and you will be redirected to 'Your Licenses' section
Copy and utilize the 'Free Trial' license key to create your AR experience using any editor. You can create unlimited surface tracking or marker tracking experiences using any of the rendering engines such as A-frame, Babylon. js, PlayCanvas or Unity. You can also test and develop locally.
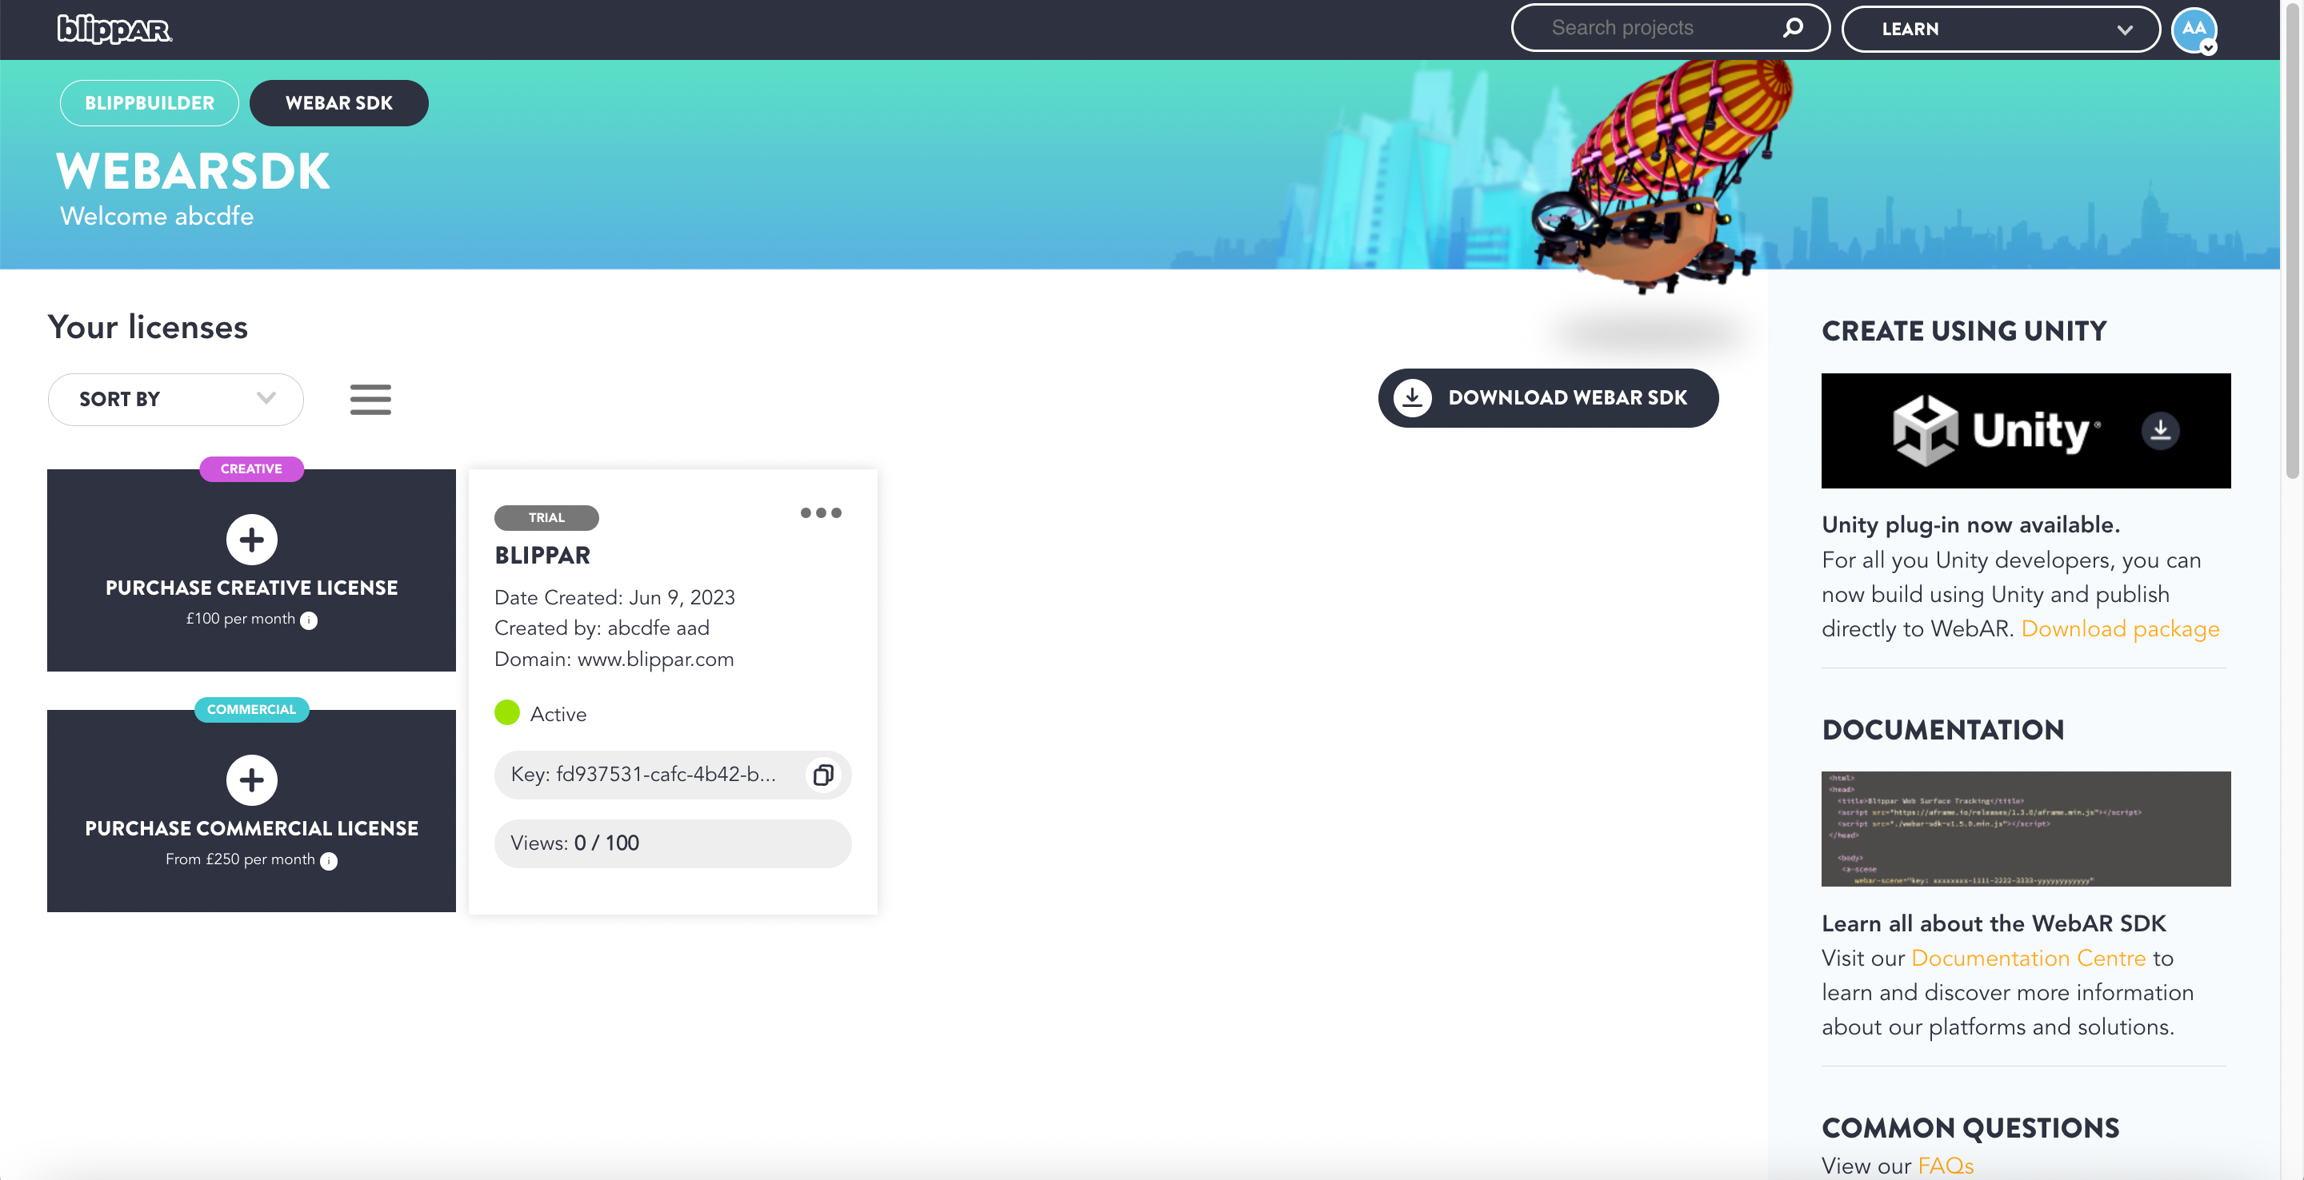
You can change or update your domain information or add image markers
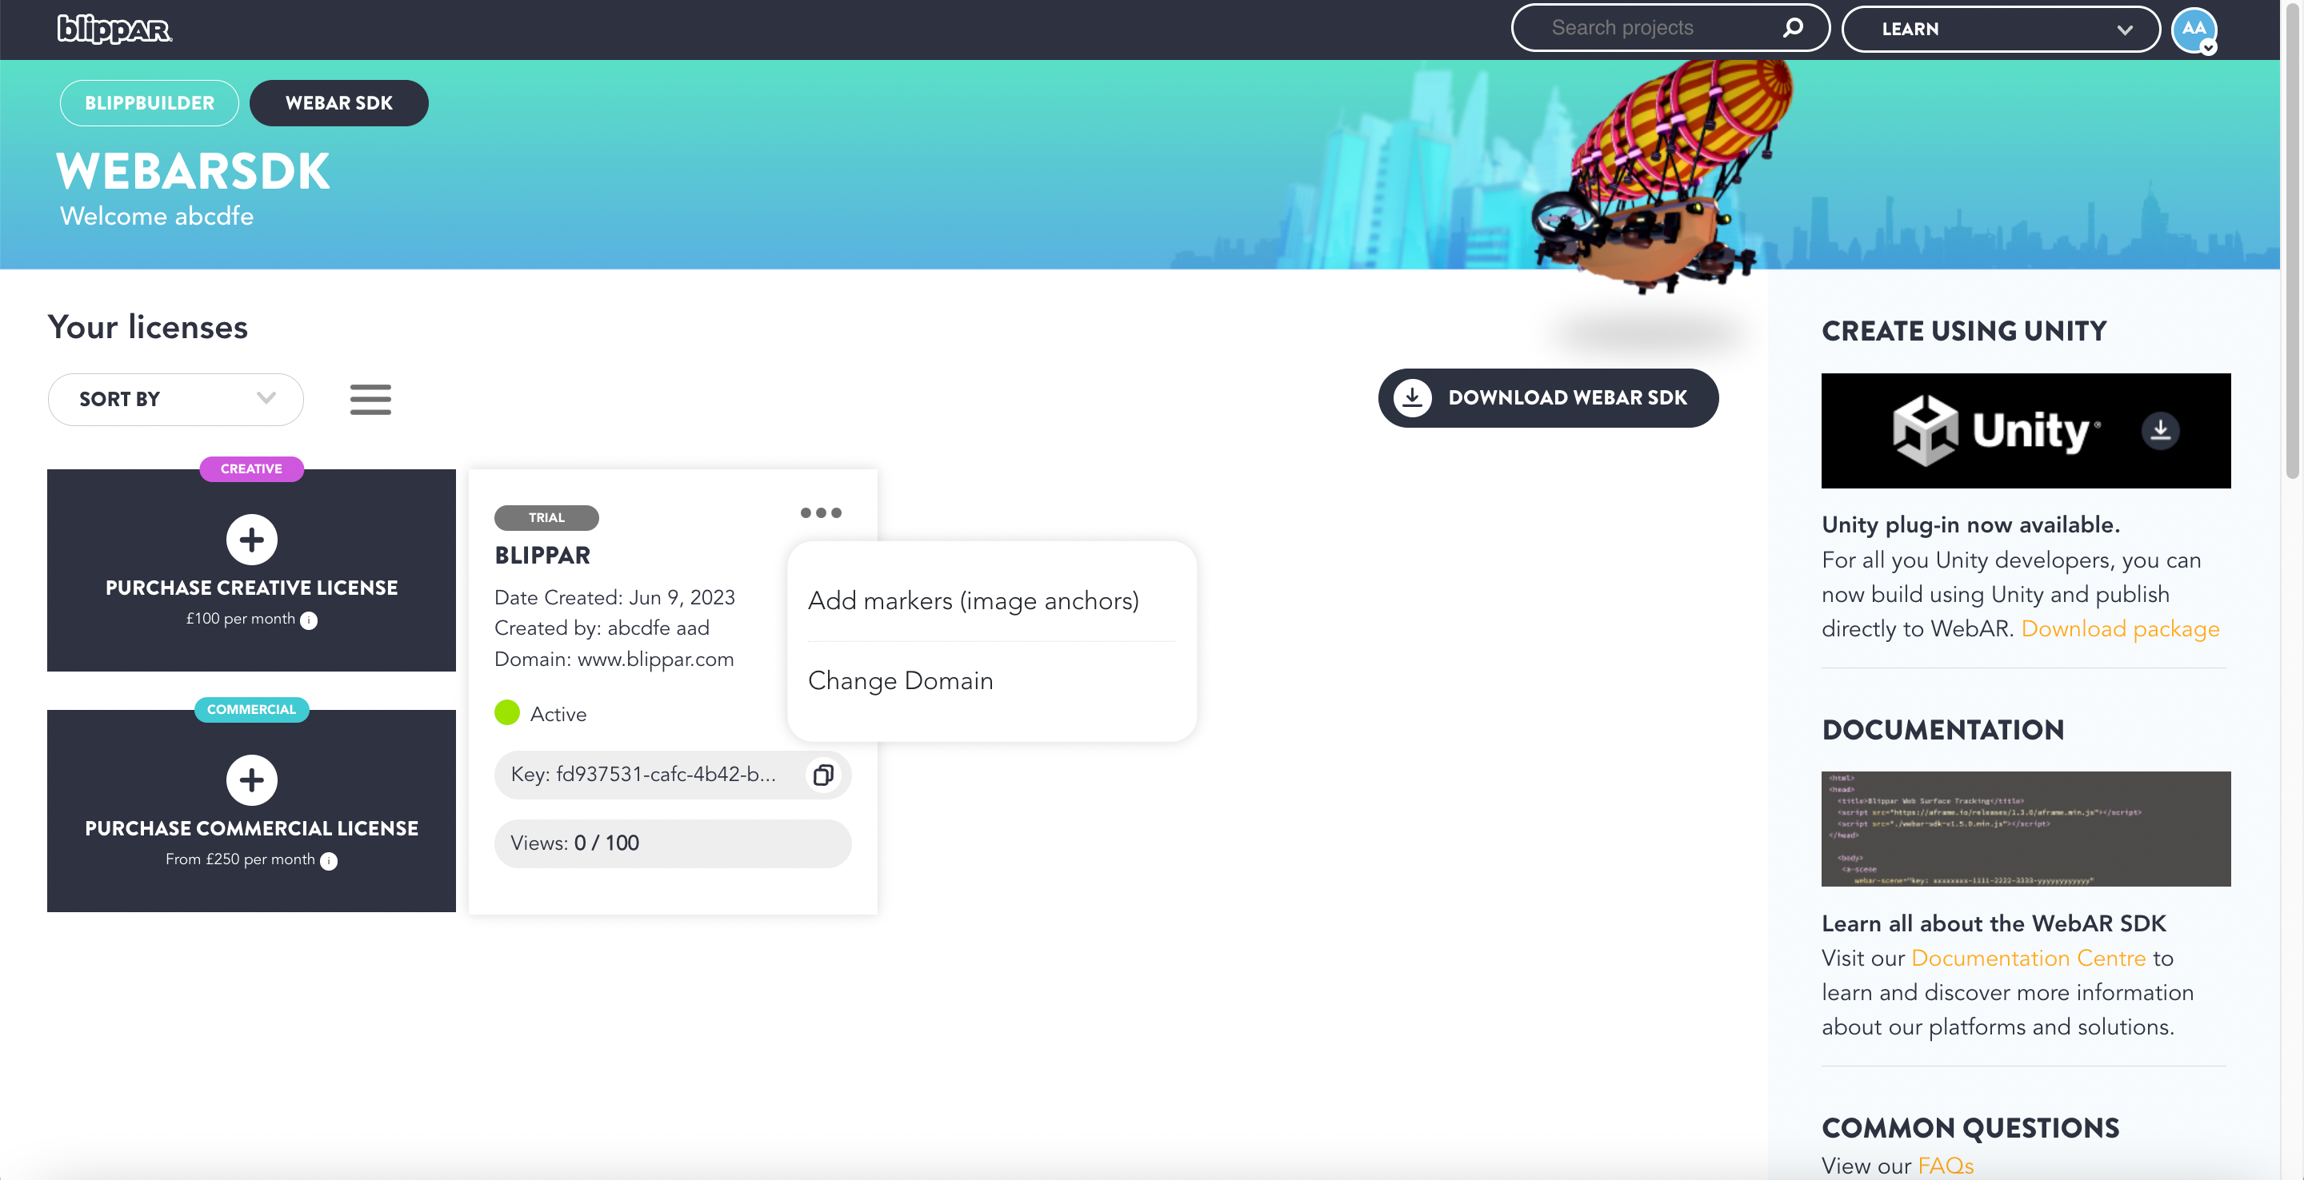
The domain entered here must match where you will deploy the AR Experience. You can only change/update the domain for a license one-time before any views are utilized. A license key can be linked to only one specific domain.
If you don't have a domain yet, feel free to enter blippar.com or any other domain, or just develop locally. You can always create a new license once your domain is setup.
The key will be emailed to your registered email address and be available on the HUB.
Free Trial License Inclusions:
Utilise our WebAR SDK kit for a test run using our free trials option to get started:
You will have 100 free views
Online support
Self hosting
Surface and marker tracking
Blippar watermark
License validity 1 month
Creative License
WebAR SDK allows you to build and share your experiences with your clients and partners. Build unlimited AR experiences and host them on your domain. Create Marker or Surface tracking experiences using the 'Creative License' and launch the experience in any mobile browser.
Process to Create a Creative License

Click the icon 'Use WebAR SDK' to and you will be redirected to 'Your Licenses' section

Click on the '+' icon to 'Purchase Creative License'
You will get a pop-up proving the payment and feature related information:
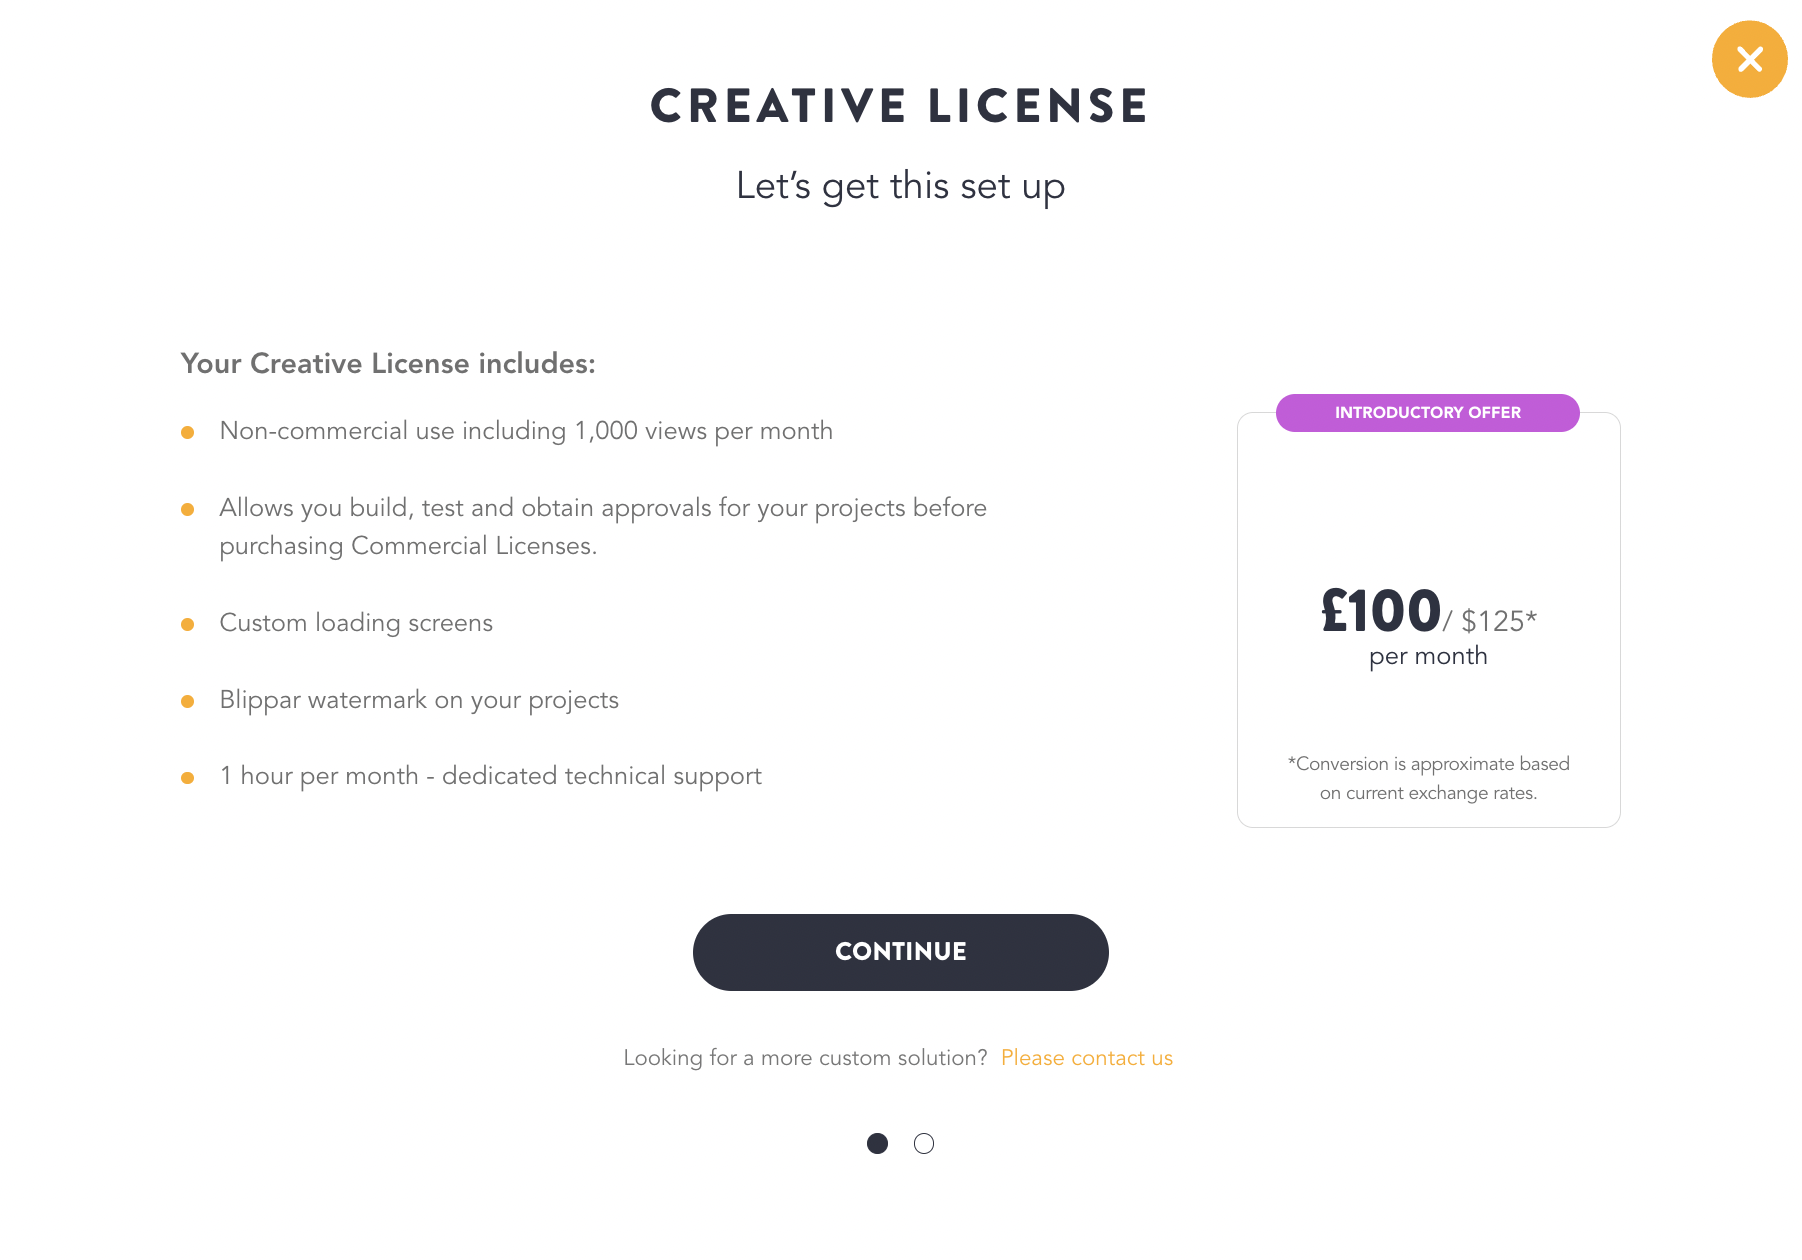
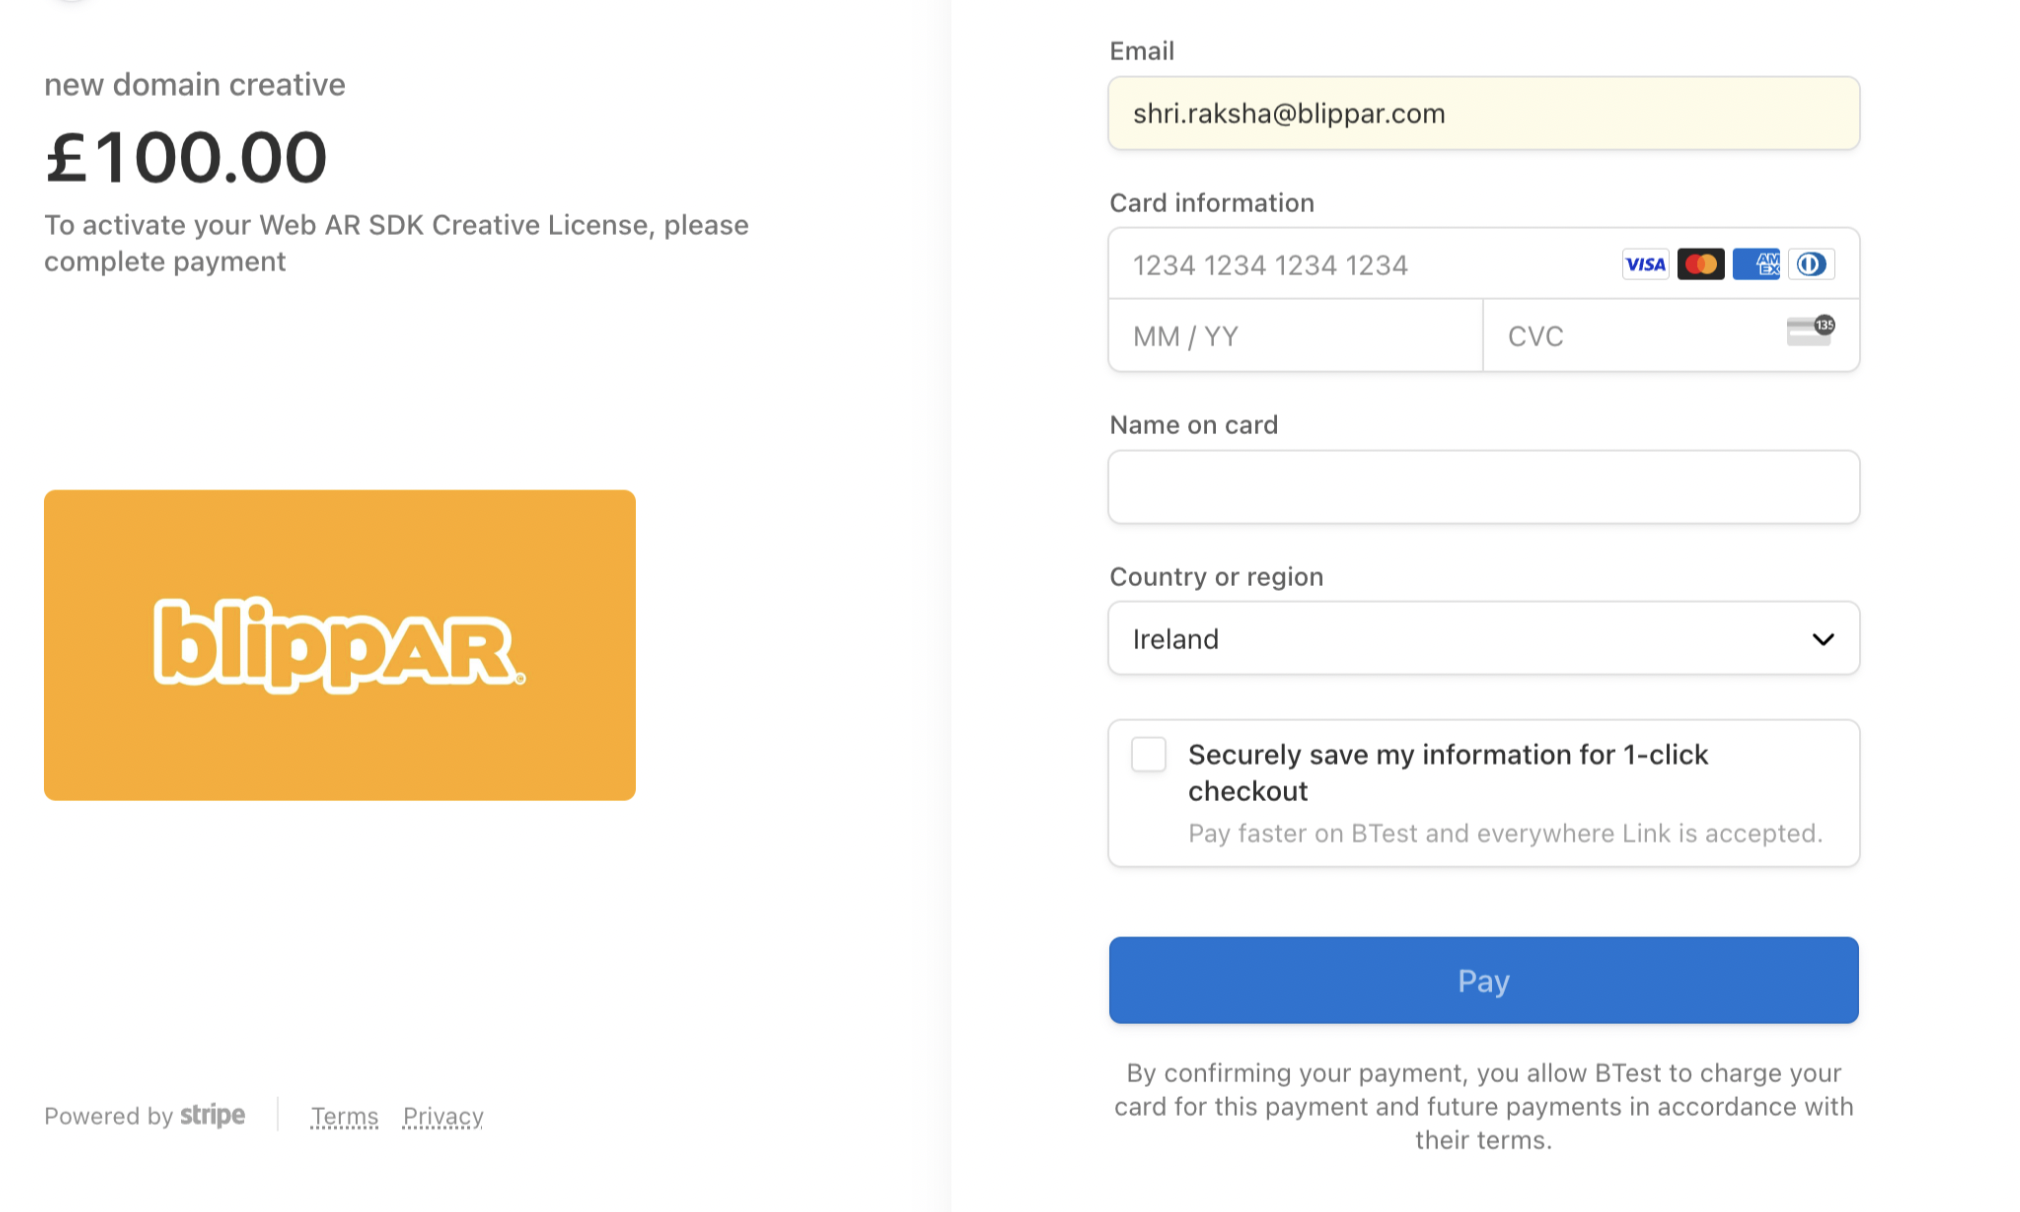
Click 'Continue' and you will redirected to the payment screen.
You will get a pop-up confirming your license creation.
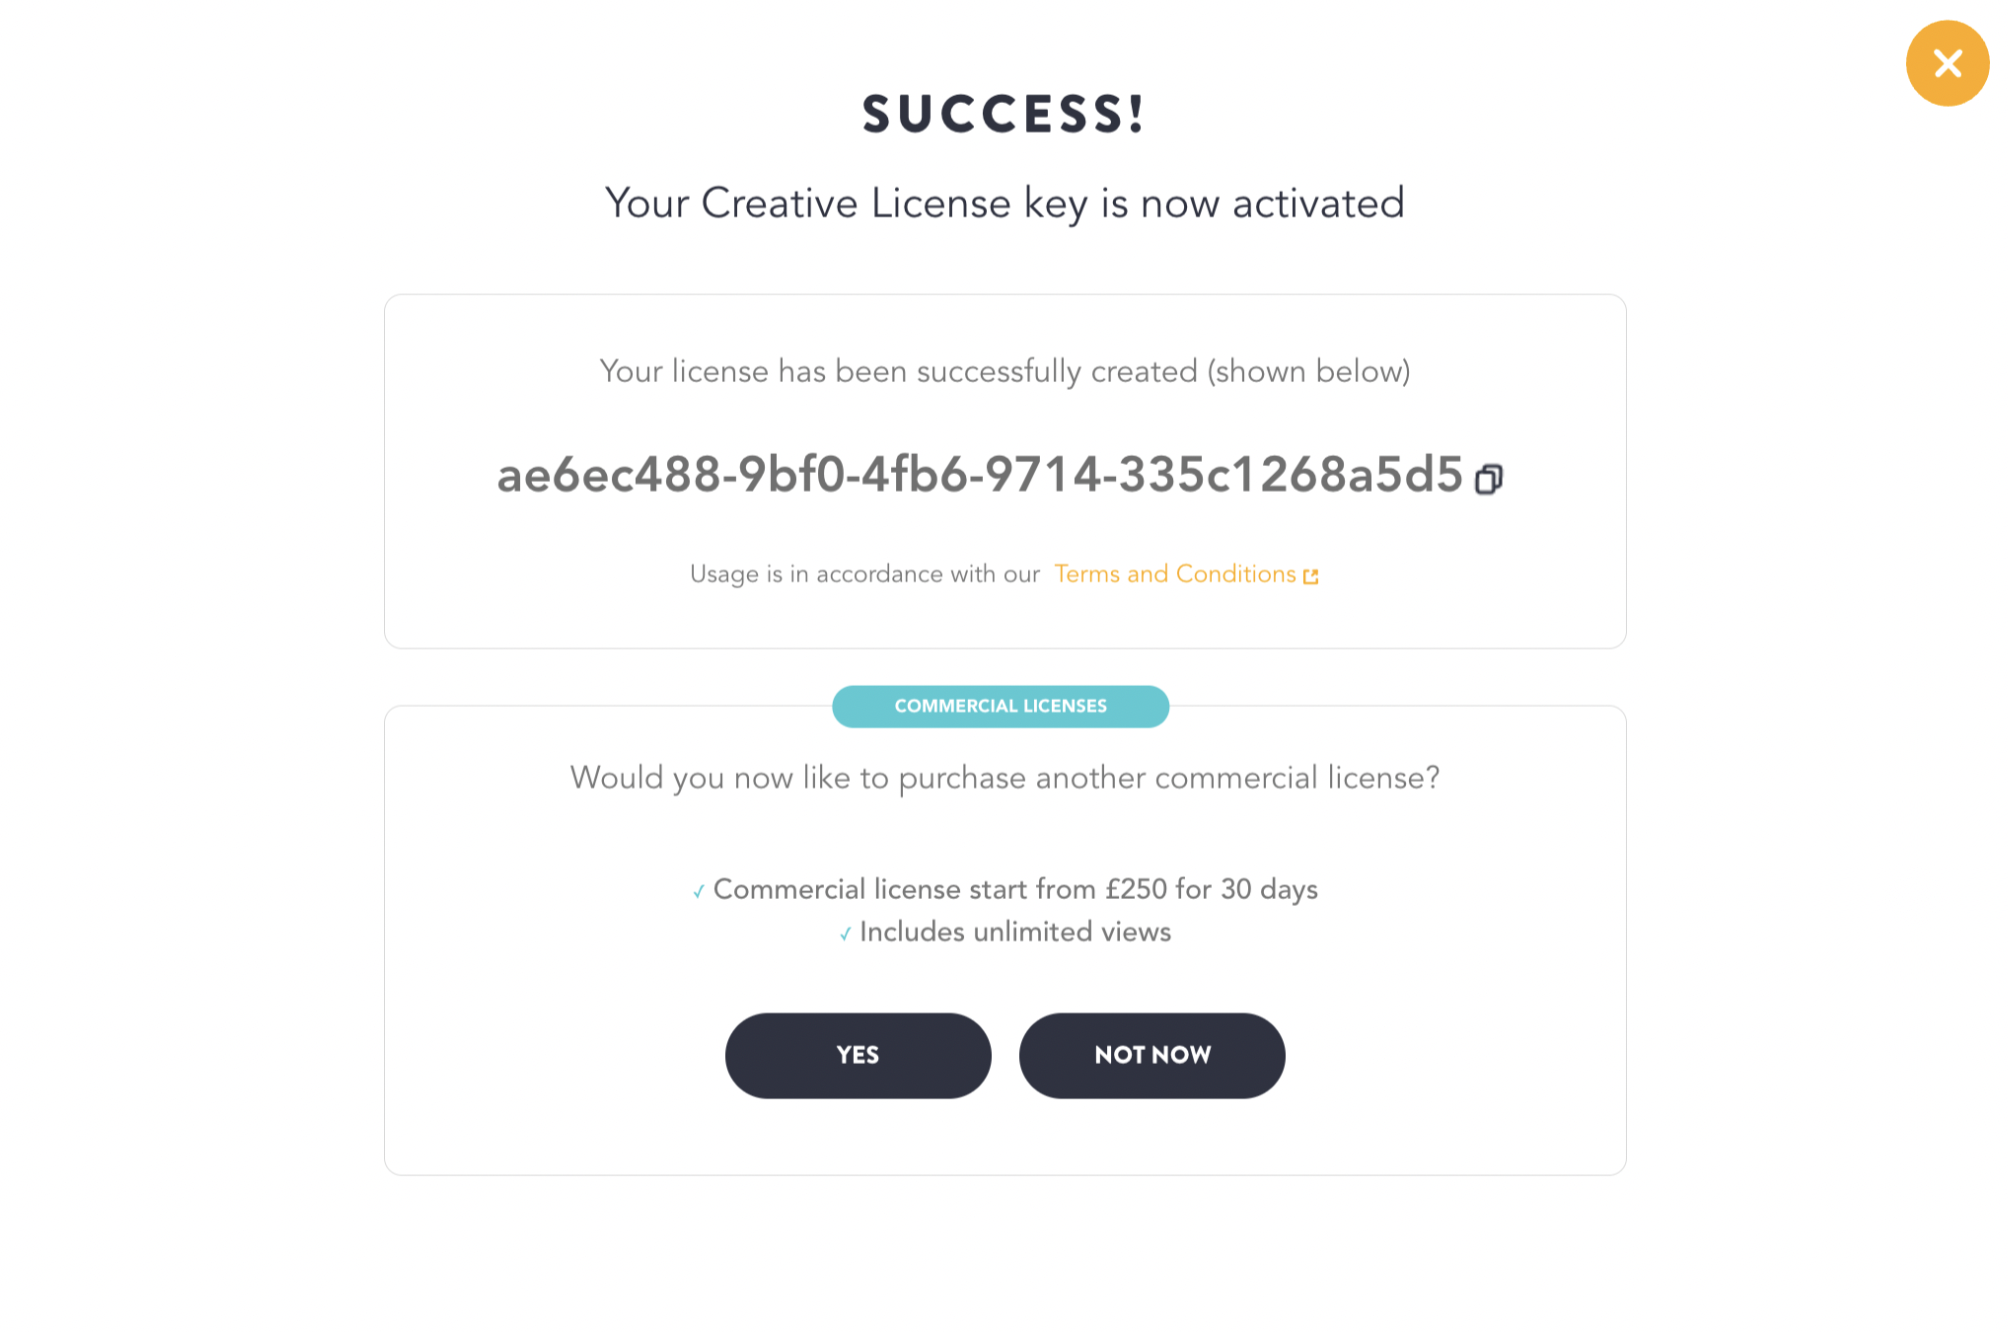
The domain entered here must match where you will deploy the AR Experience. You can only change/update the domain for a license one-time before any views are utilized. A license key can be linked to only one specific domain.
If you don't have a domain yet, feel free to enter blippar.com or any other domain, or just develop locally. You can always create a new license once your domain is setup.
The key will be emailed to your registered email address and be available on the HUB.
Creative License Inclusions:
Utilise our WebAR SDK kit for a test run using our free trials option to get started:
1000 views (monthly)
1hr technical support (monthly)
Self hosting
Surface and Marker tracking
Customisable loading screens
Online support
Self hosting
Surface and marker tracking
Blippar watermark
License validity 1 month and is set to auto renew.
Commercial License
Share your experiences with the world with 'Unlimited Views' by creating a commercial license.
Process to Create a Commercial License

Click the icon 'Use WebAR SDK' to and you will be redirected to 'Your Licenses' section

Click on the '+' icon to 'Purchase Commercial License'
You will get a pop-up proving the payment and feature related information:
Choose a desired commercial plan based on your needs and click 'Continue'
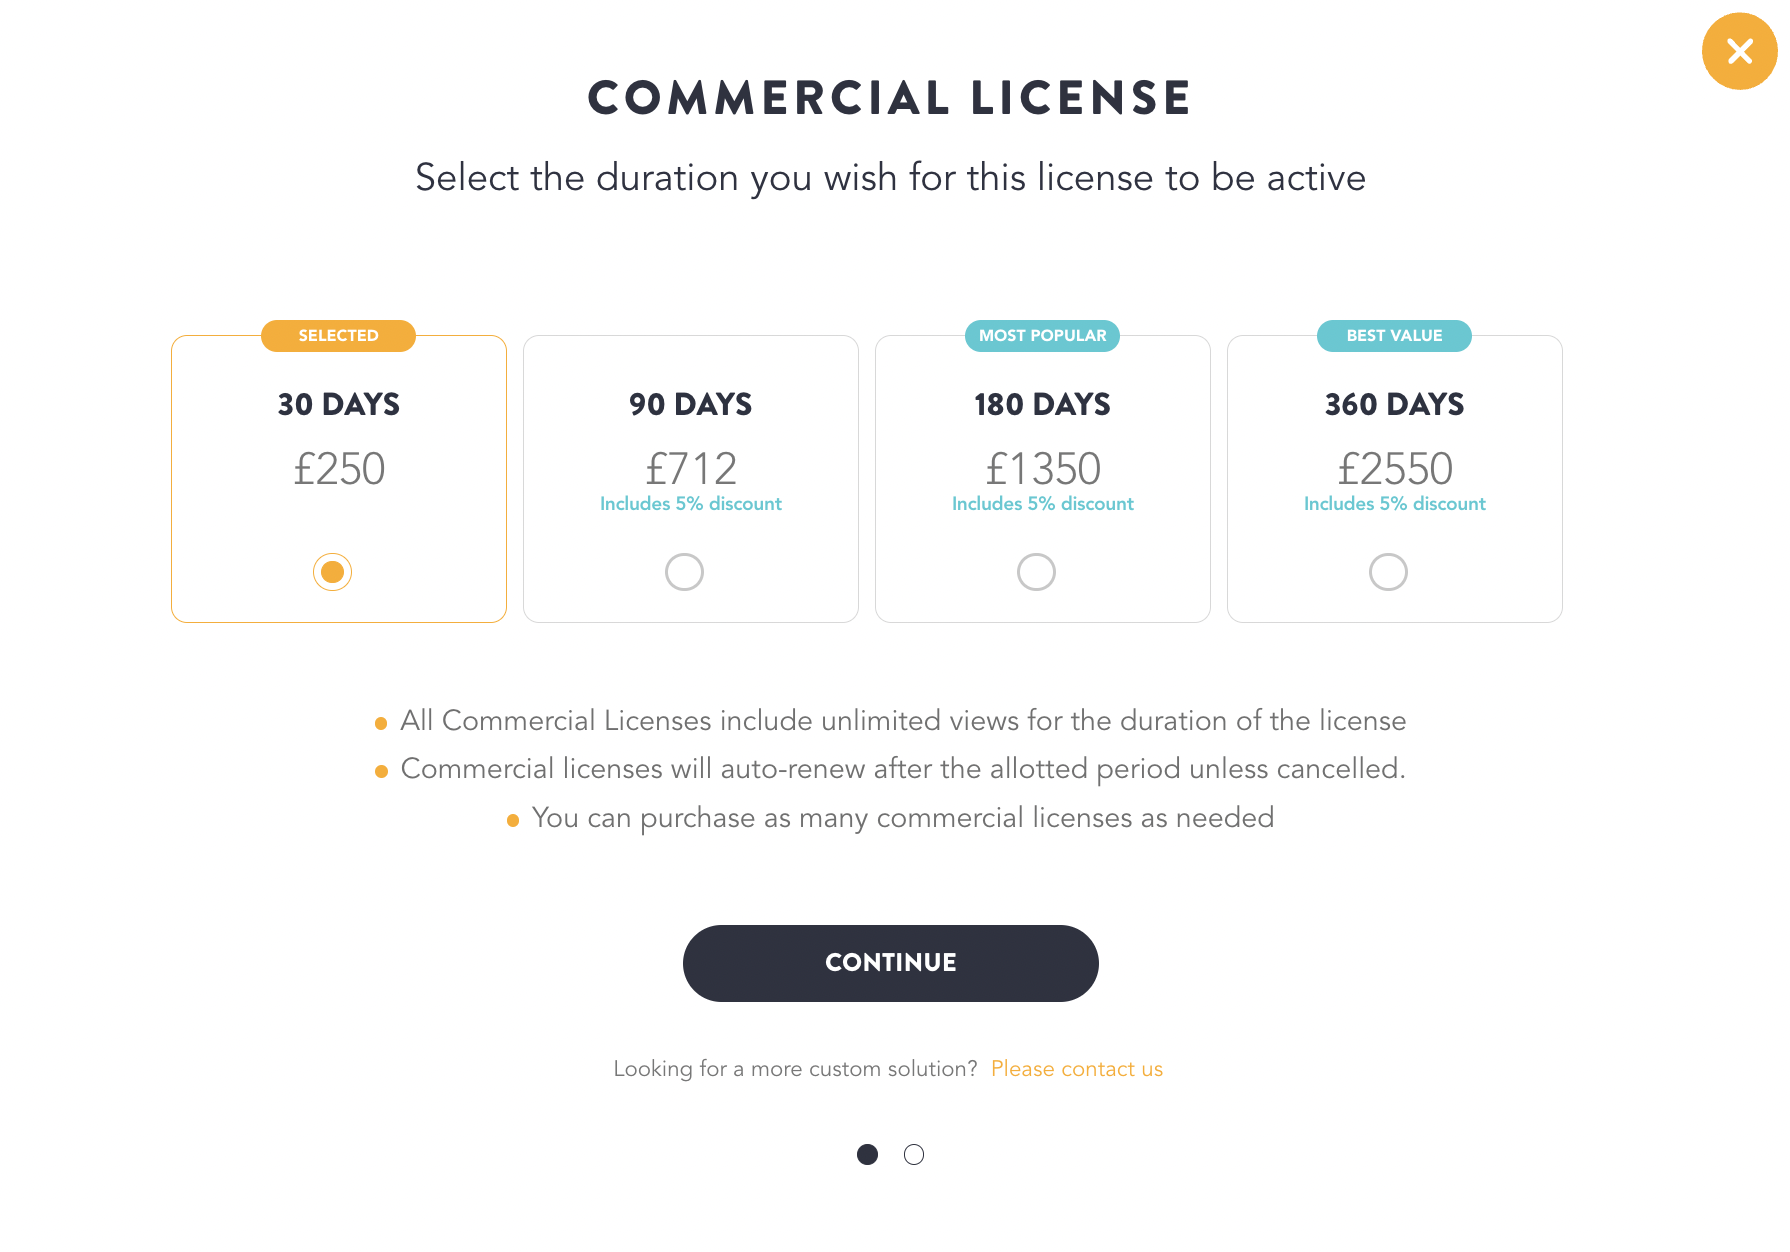
Verify payment information and click 'Pay'

You will get a pop-up confirming your license creation.
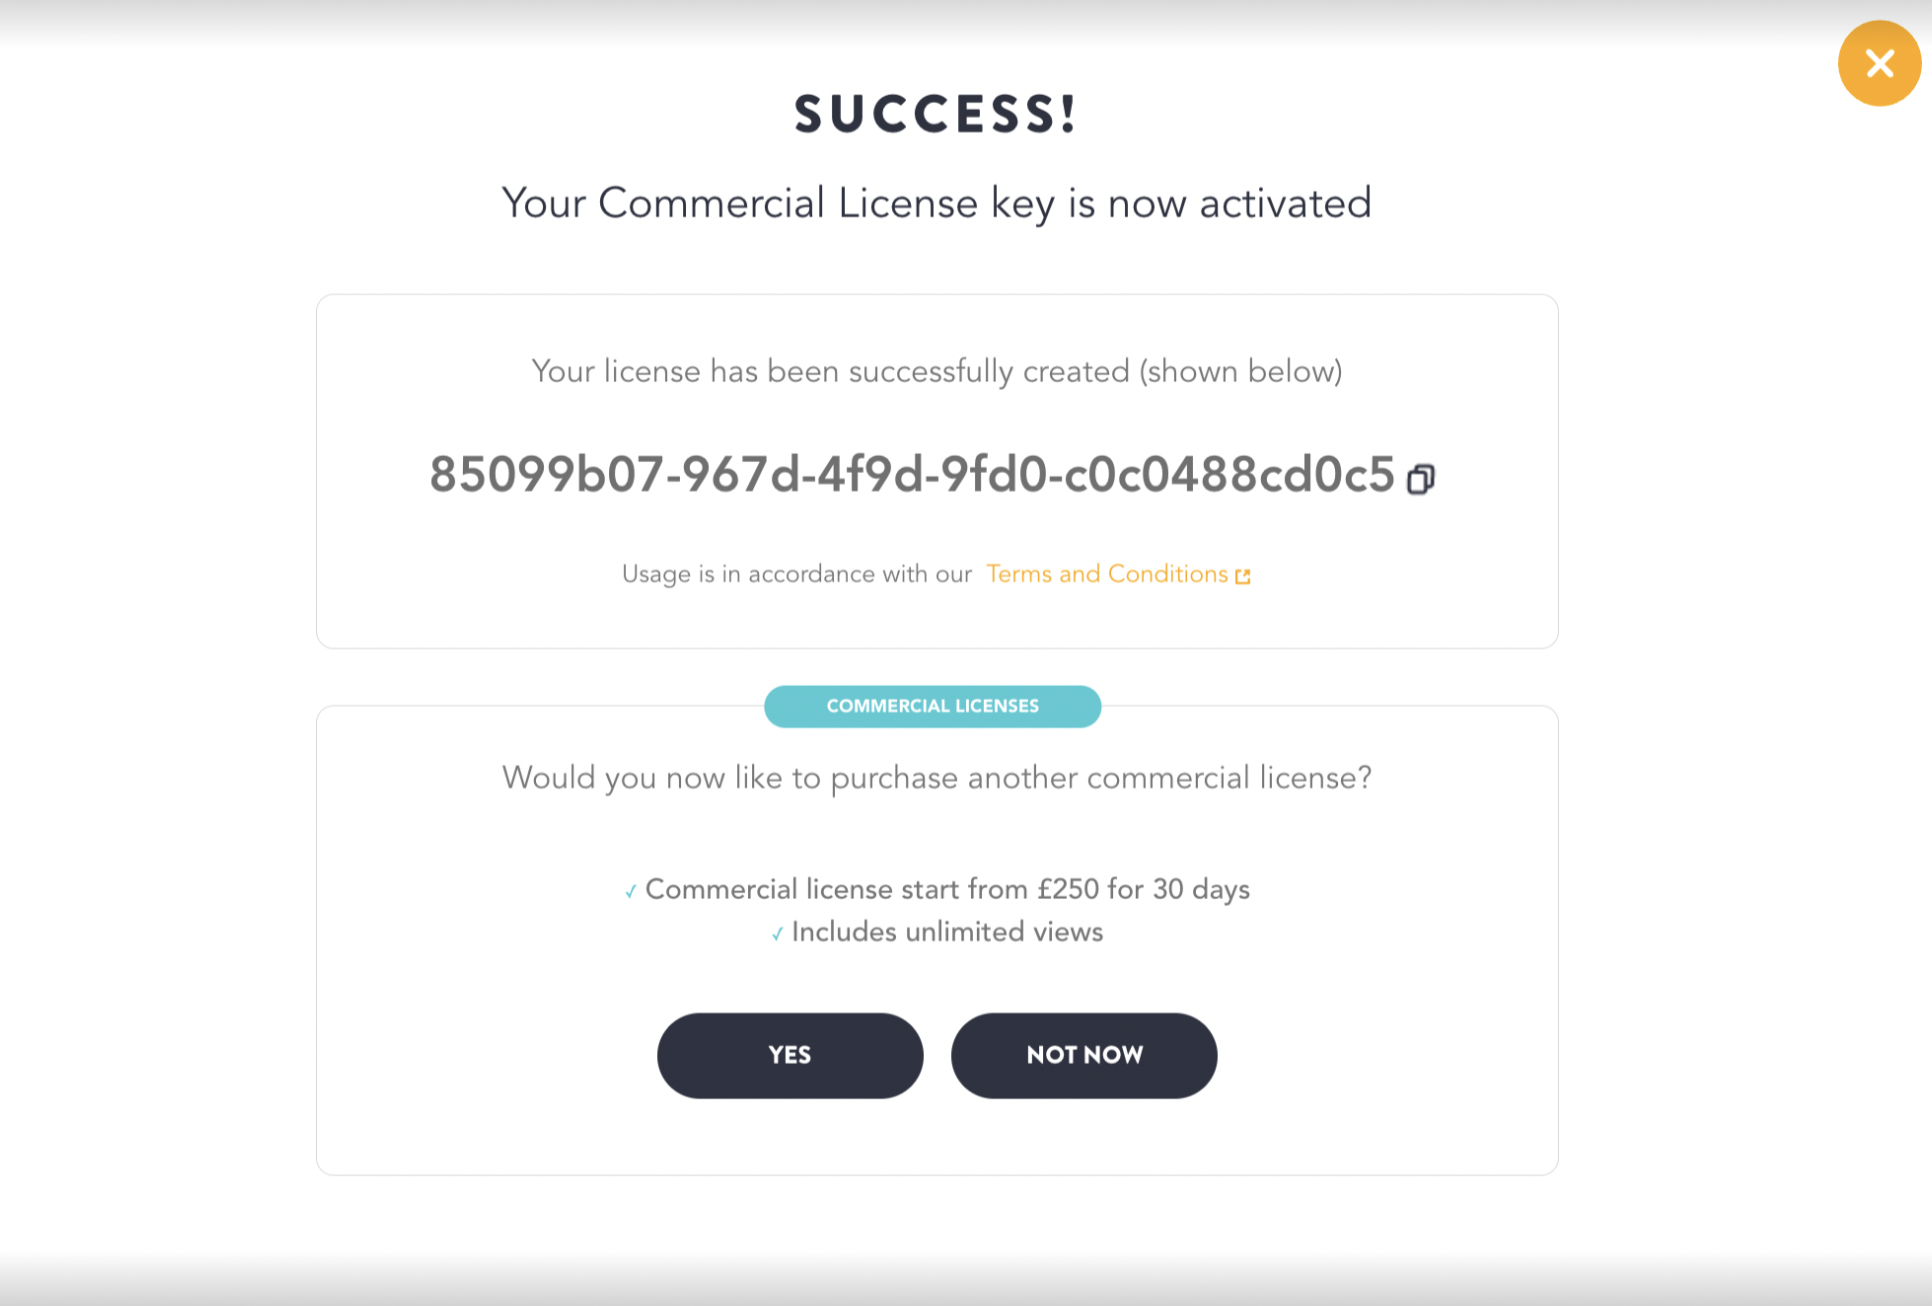
The domain entered here must match where you will deploy the AR Experience. You can only change/update the domain for a license one-time before any views are utilized. A license key can be linked to only one specific domain.
If you don't have a domain yet, feel free to enter blippar.com or any other domain, or just develop locally. You can always create a new license once your domain is setup.
The key will be emailed to your registered email address and be available on the HUB.
Commercial License Inclusions:
Utilise our WebAR SDK kit for a test run using our free trails option to get started:
Unlimited views
1hr technical support (monthly)
Self hosting
Surface and Marker tracking
Customisable loading screens
Custom domains
No Blippar watermark.
Manage Licenses
WebAR SDK allows you to 'Manage Licenses' .

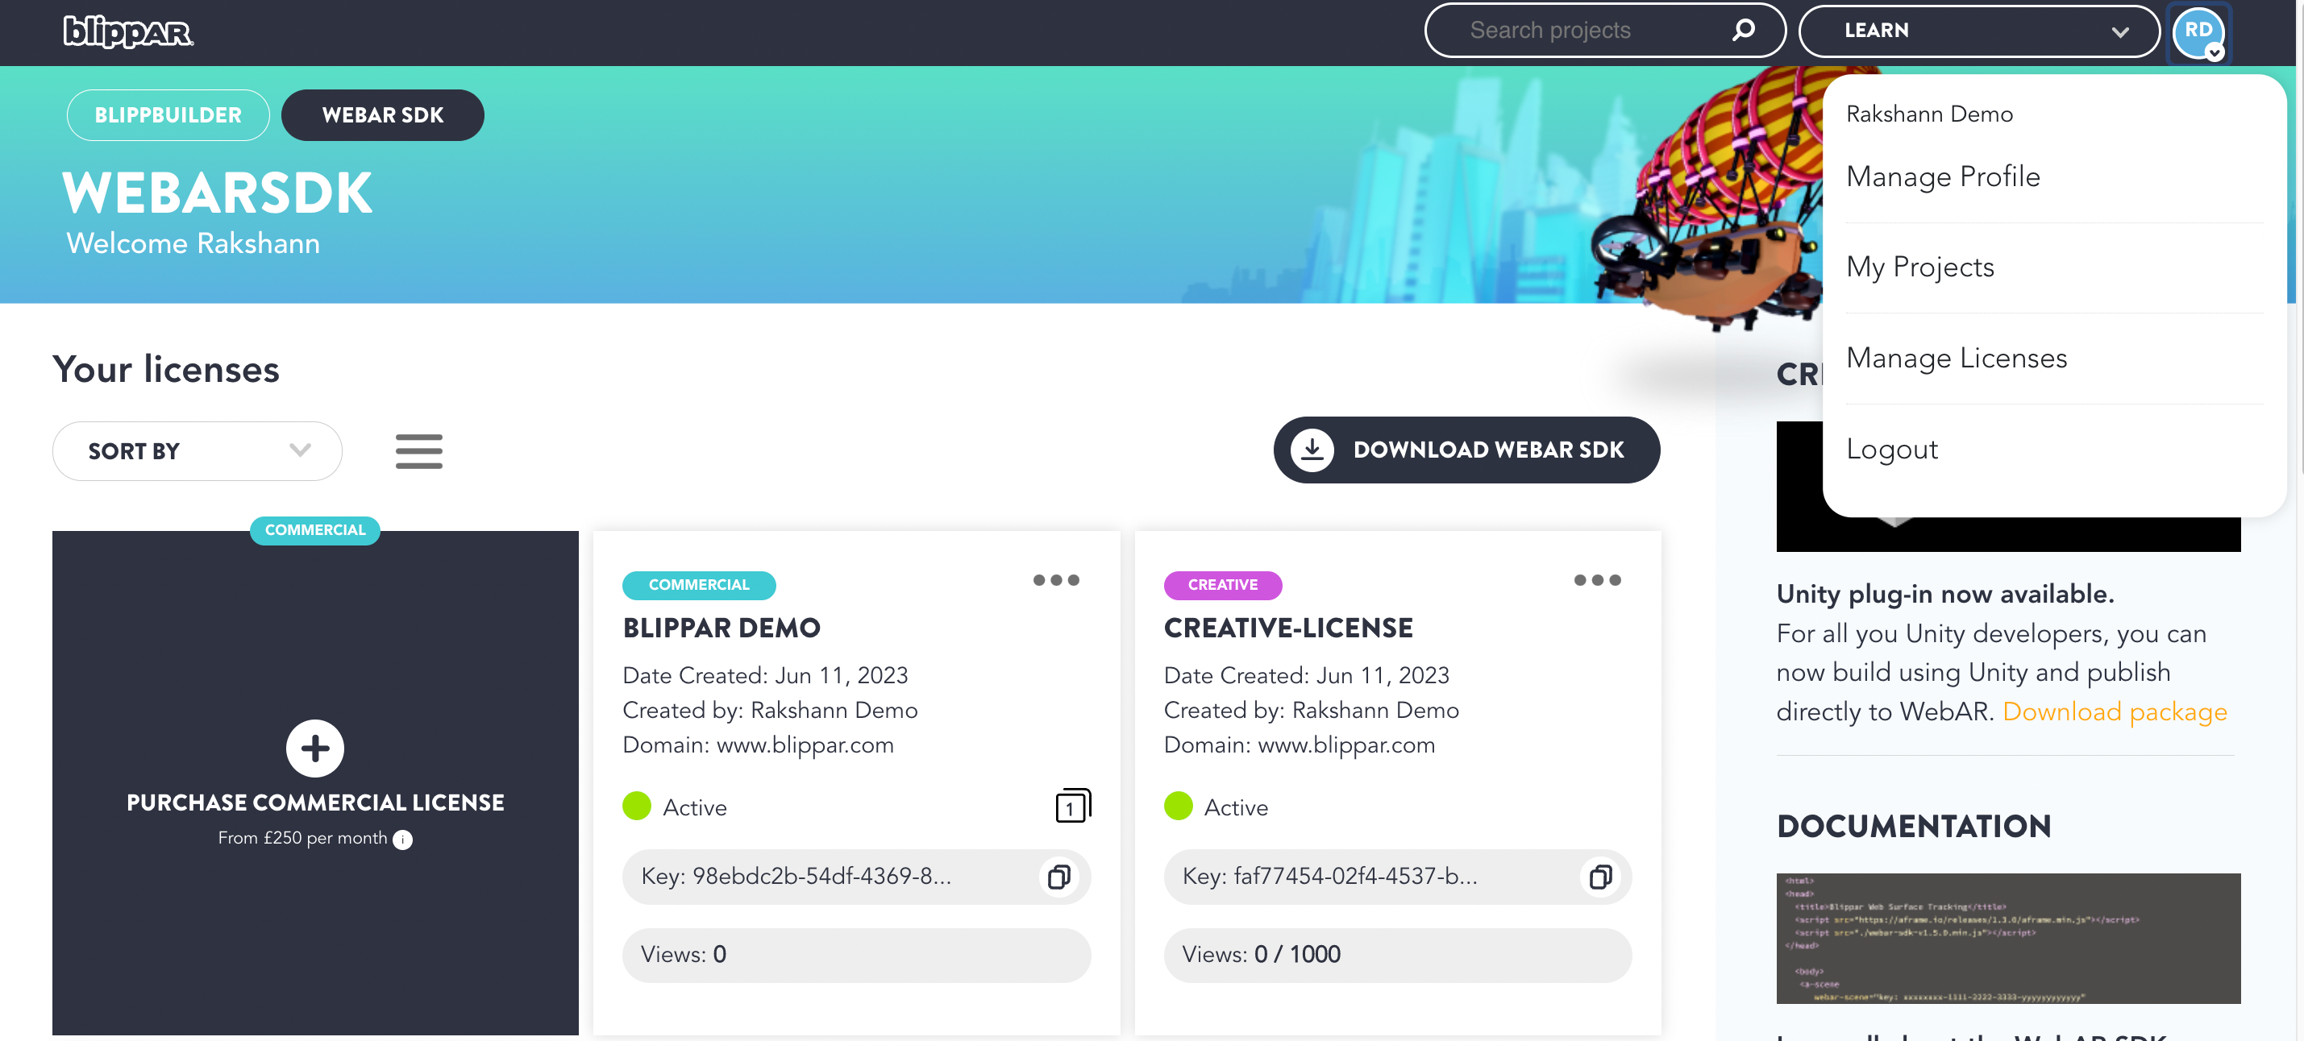
Click the icon 'Use WebAR SDK' to and you will be redirected to 'Your Licenses' section
Navigate to your profile icon and in the drop-down choose 'Manage Licenses.'
You can choose to cancel auto-payment from this section for the license.
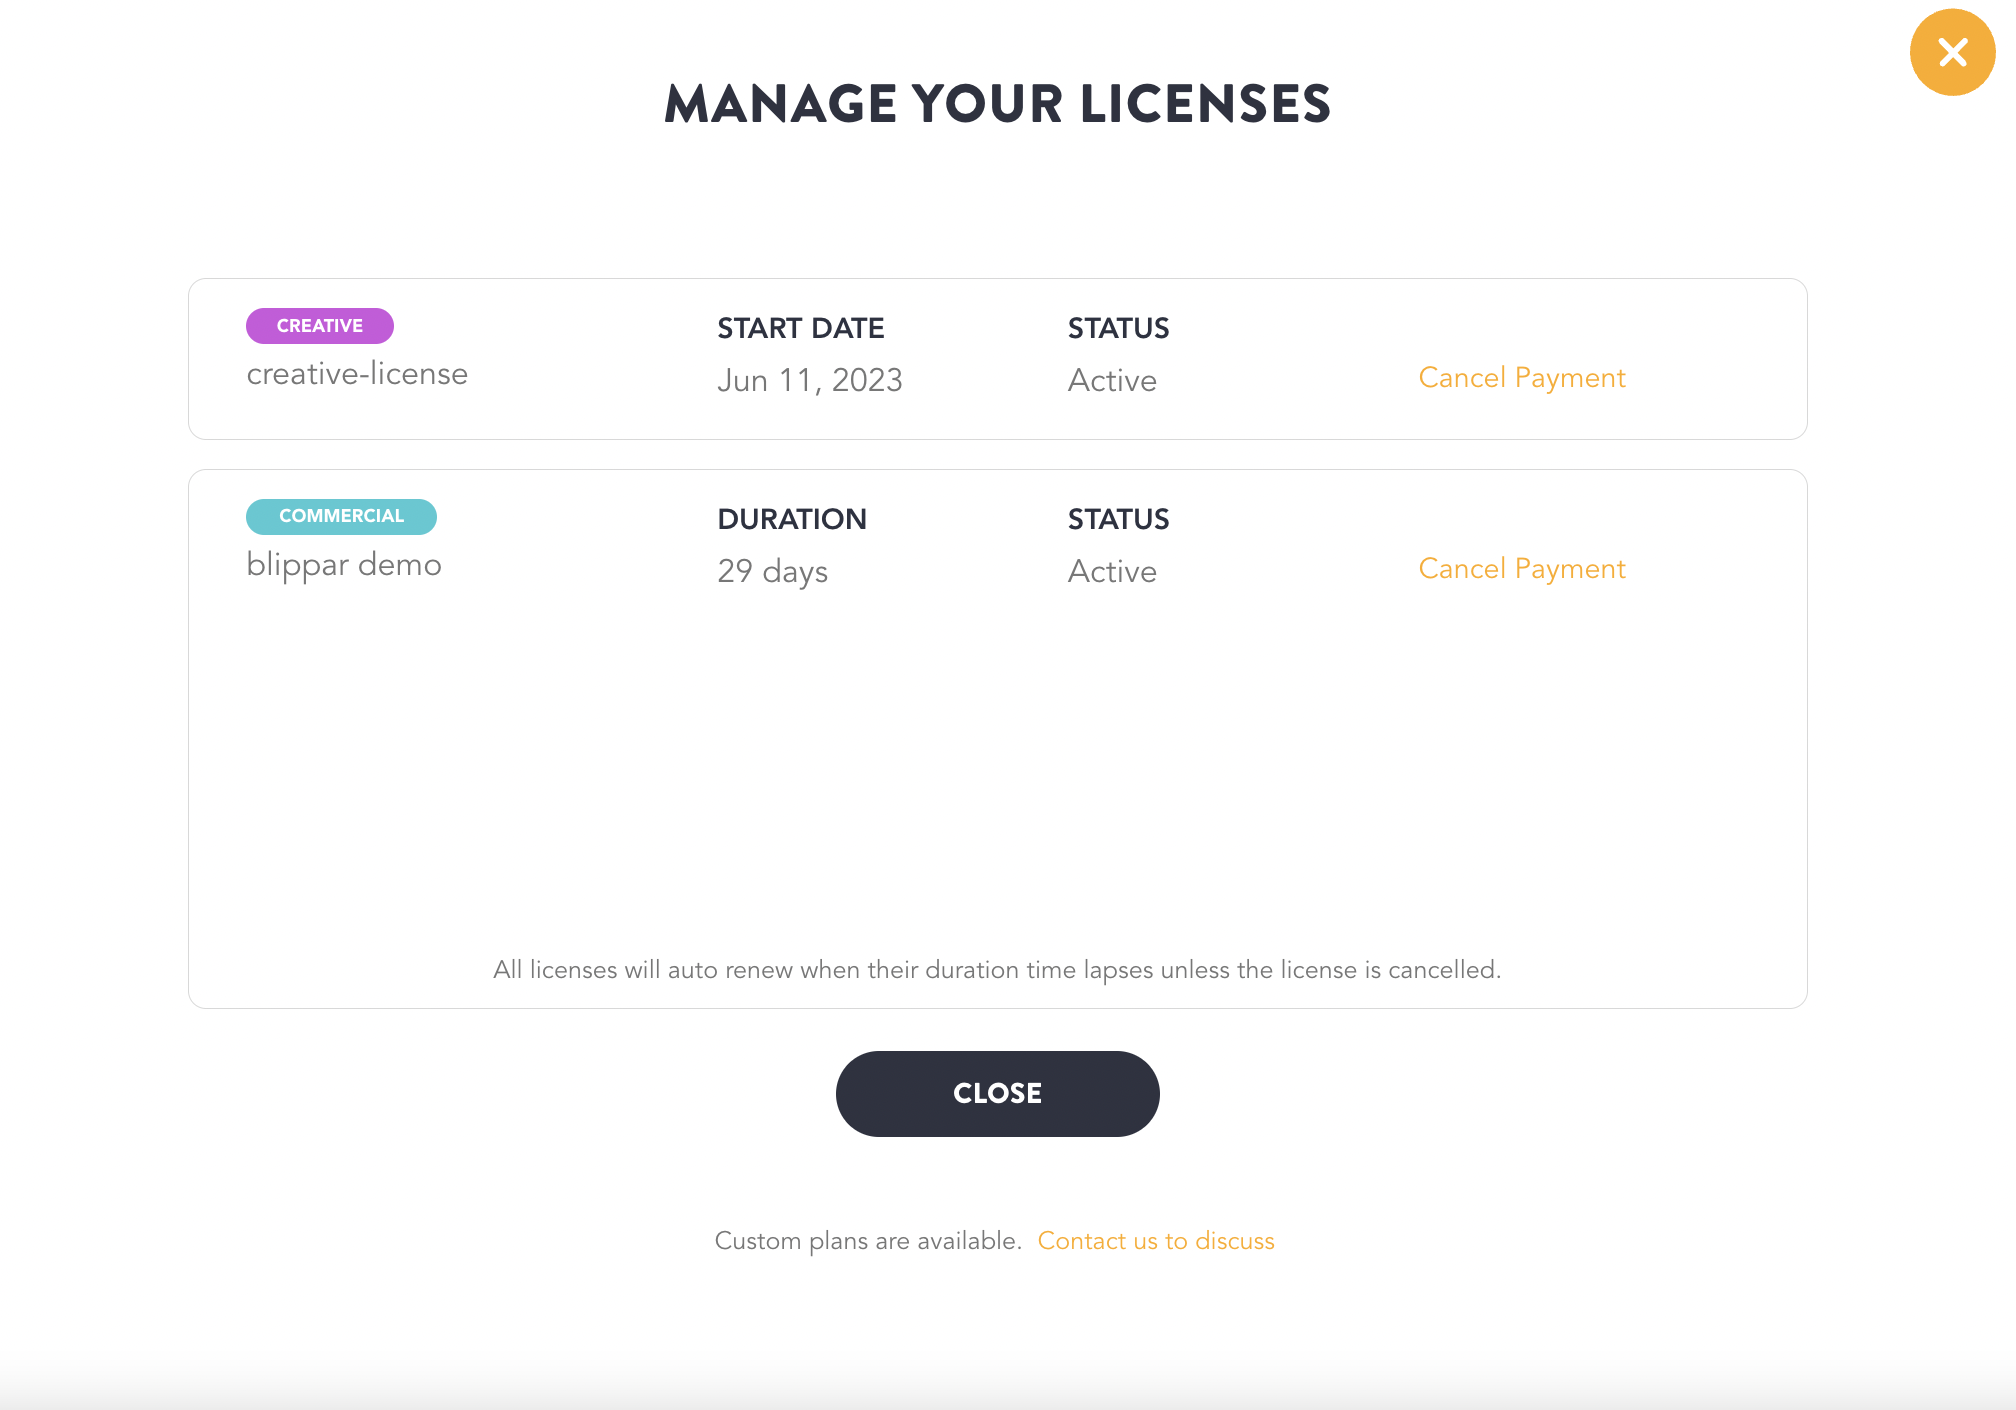
It is advisable to not 'Cancel Payment' as if the license expires, all the creations will npt be accessible and cannot be renewed. A cancelled license cannot be renewed.
Confirm the pop-up to 'Cancel Payment'
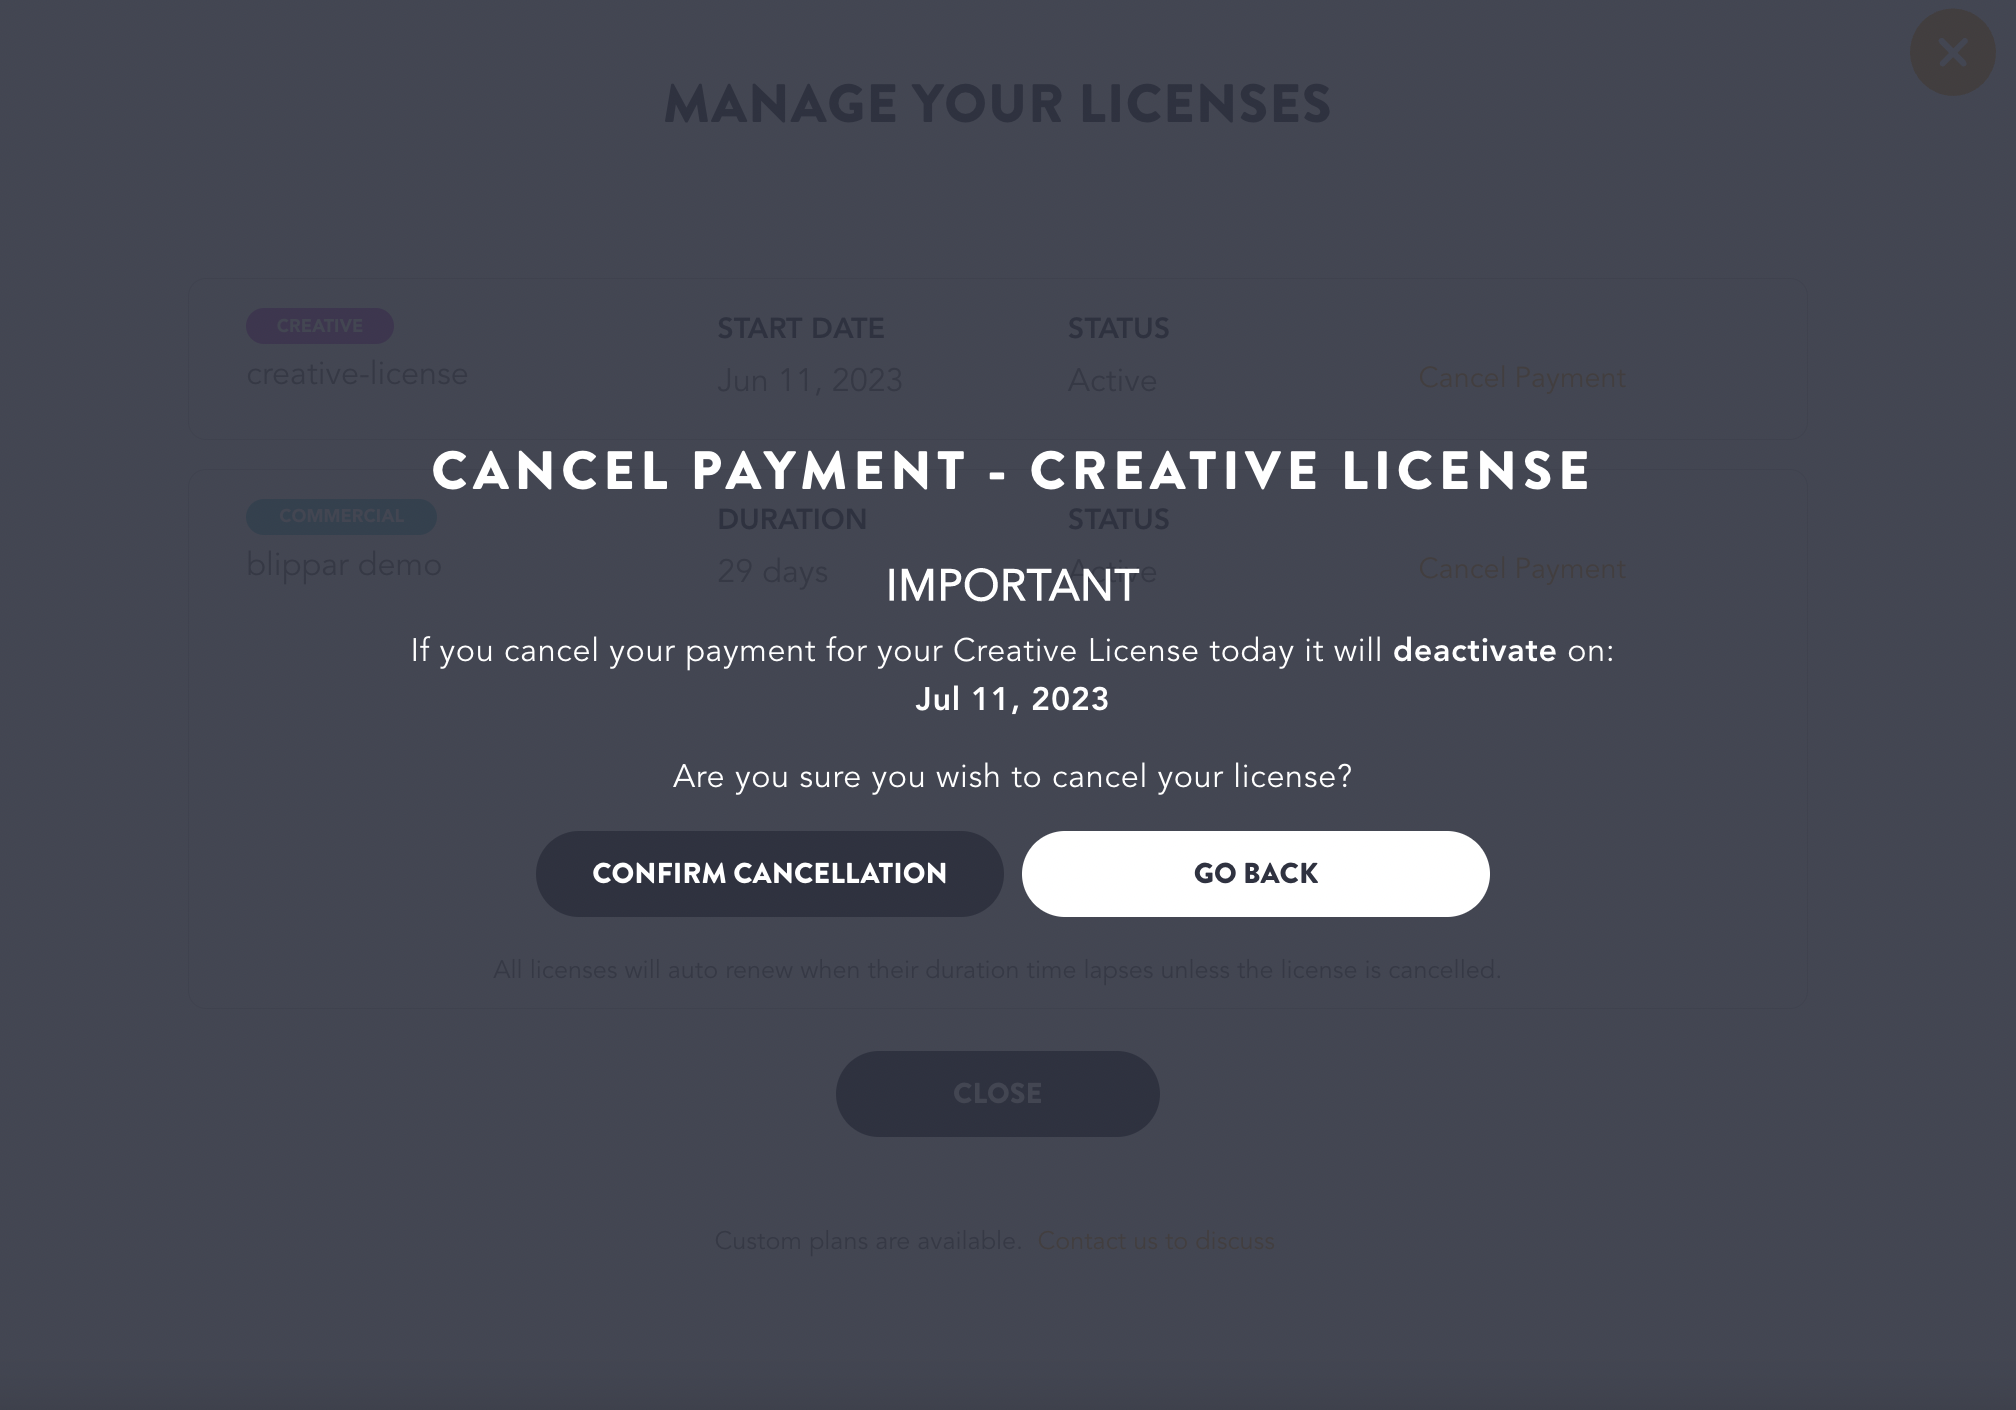
Click 'Confirm Cancellation'
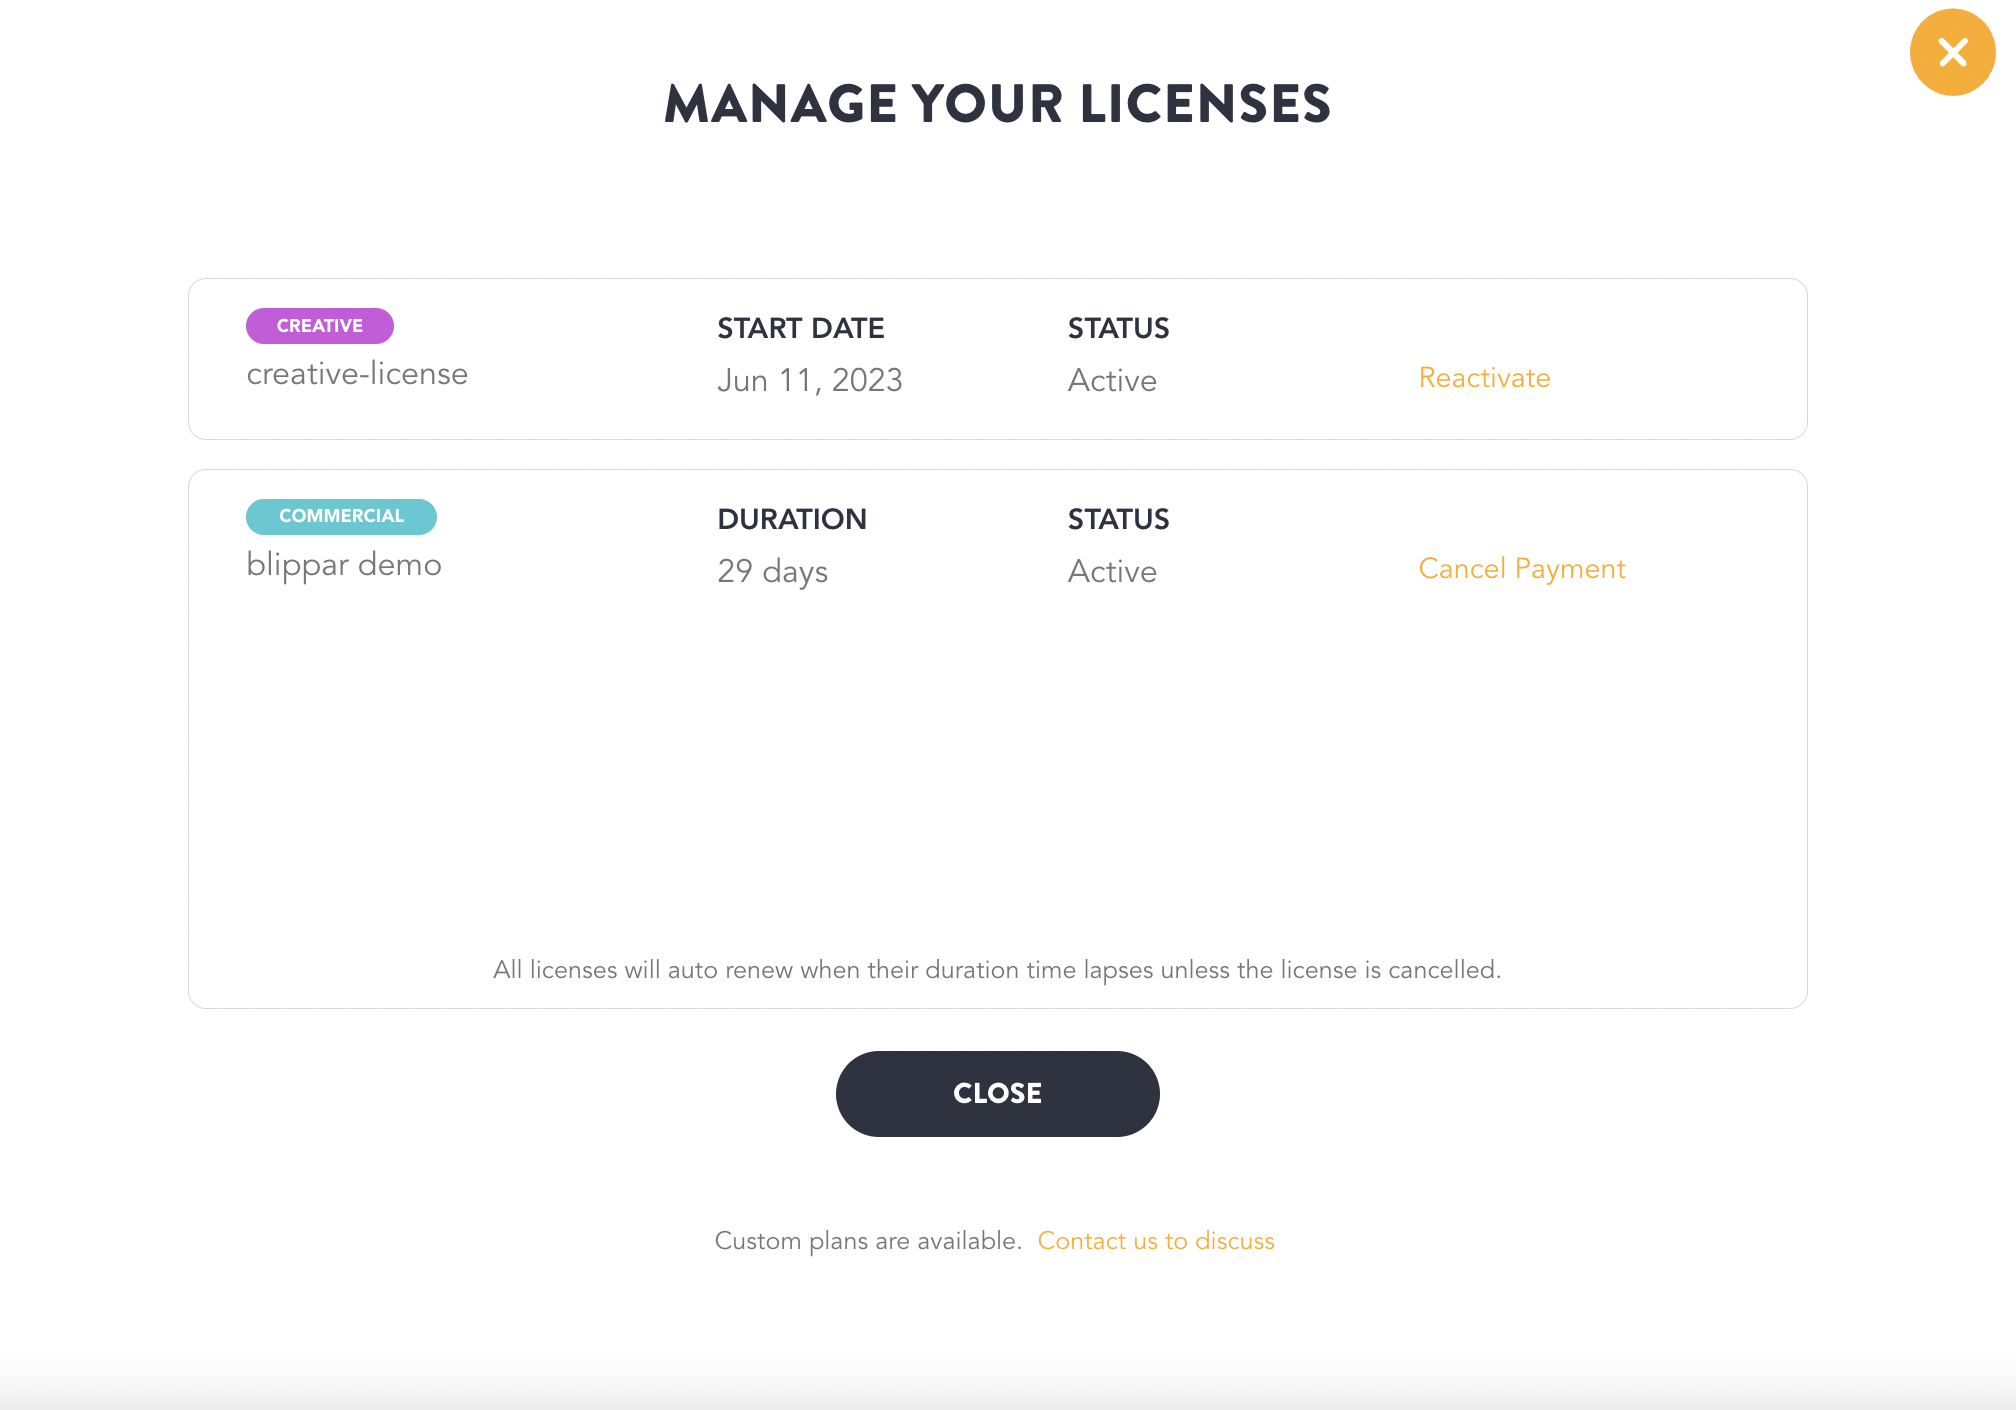
You can verify the date on which your license will expire and it will not auto renew since payment is cancelled. You can reactivate the license by clicking 'Reactivate in the same screen. Refer image below.
Change or Update Domain
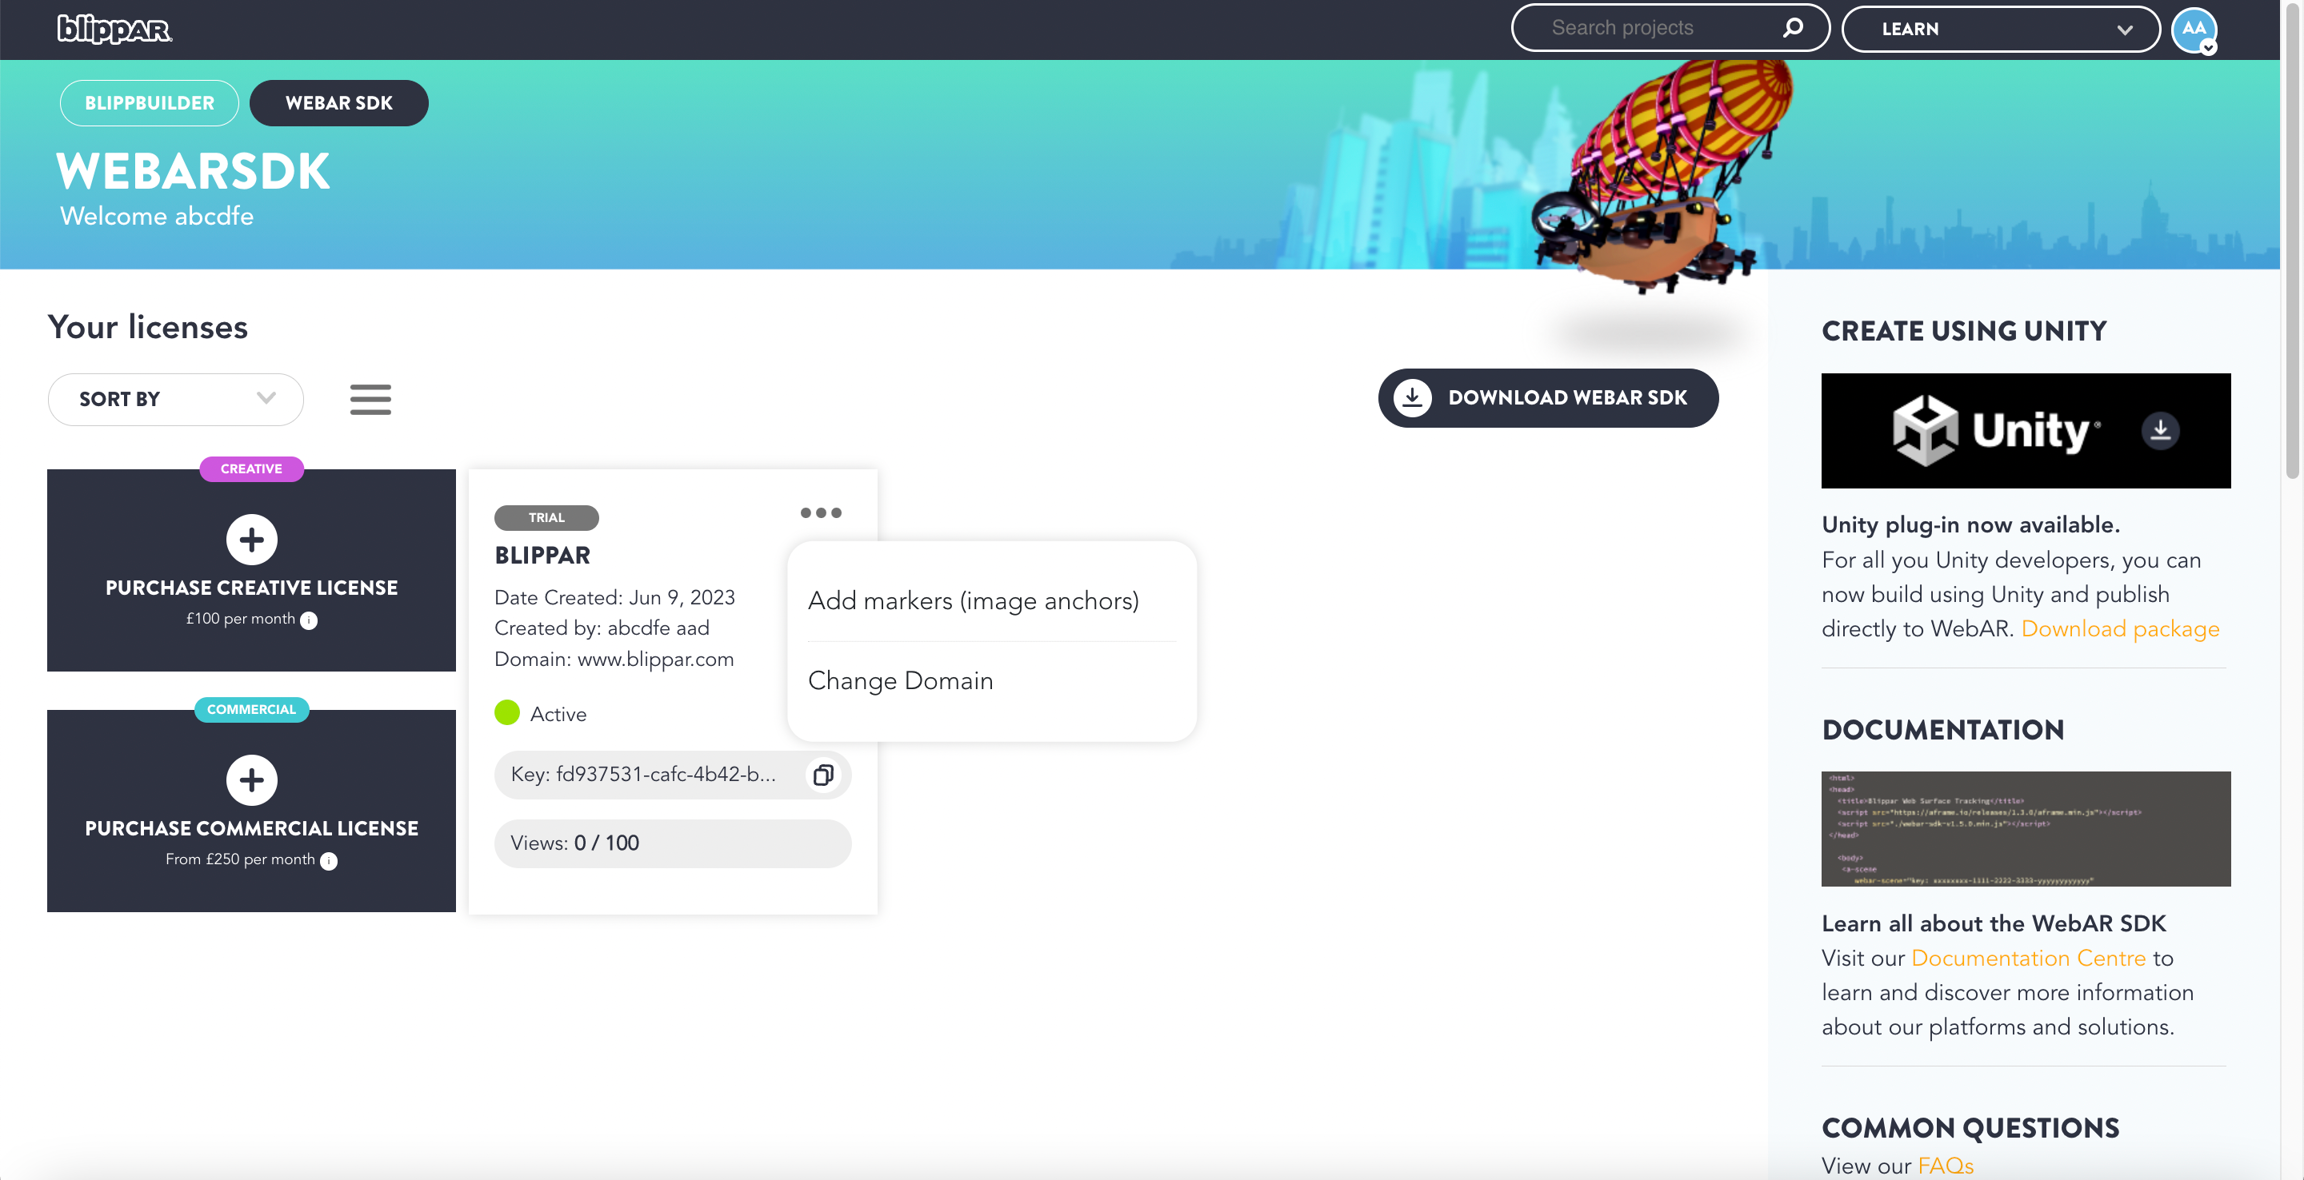
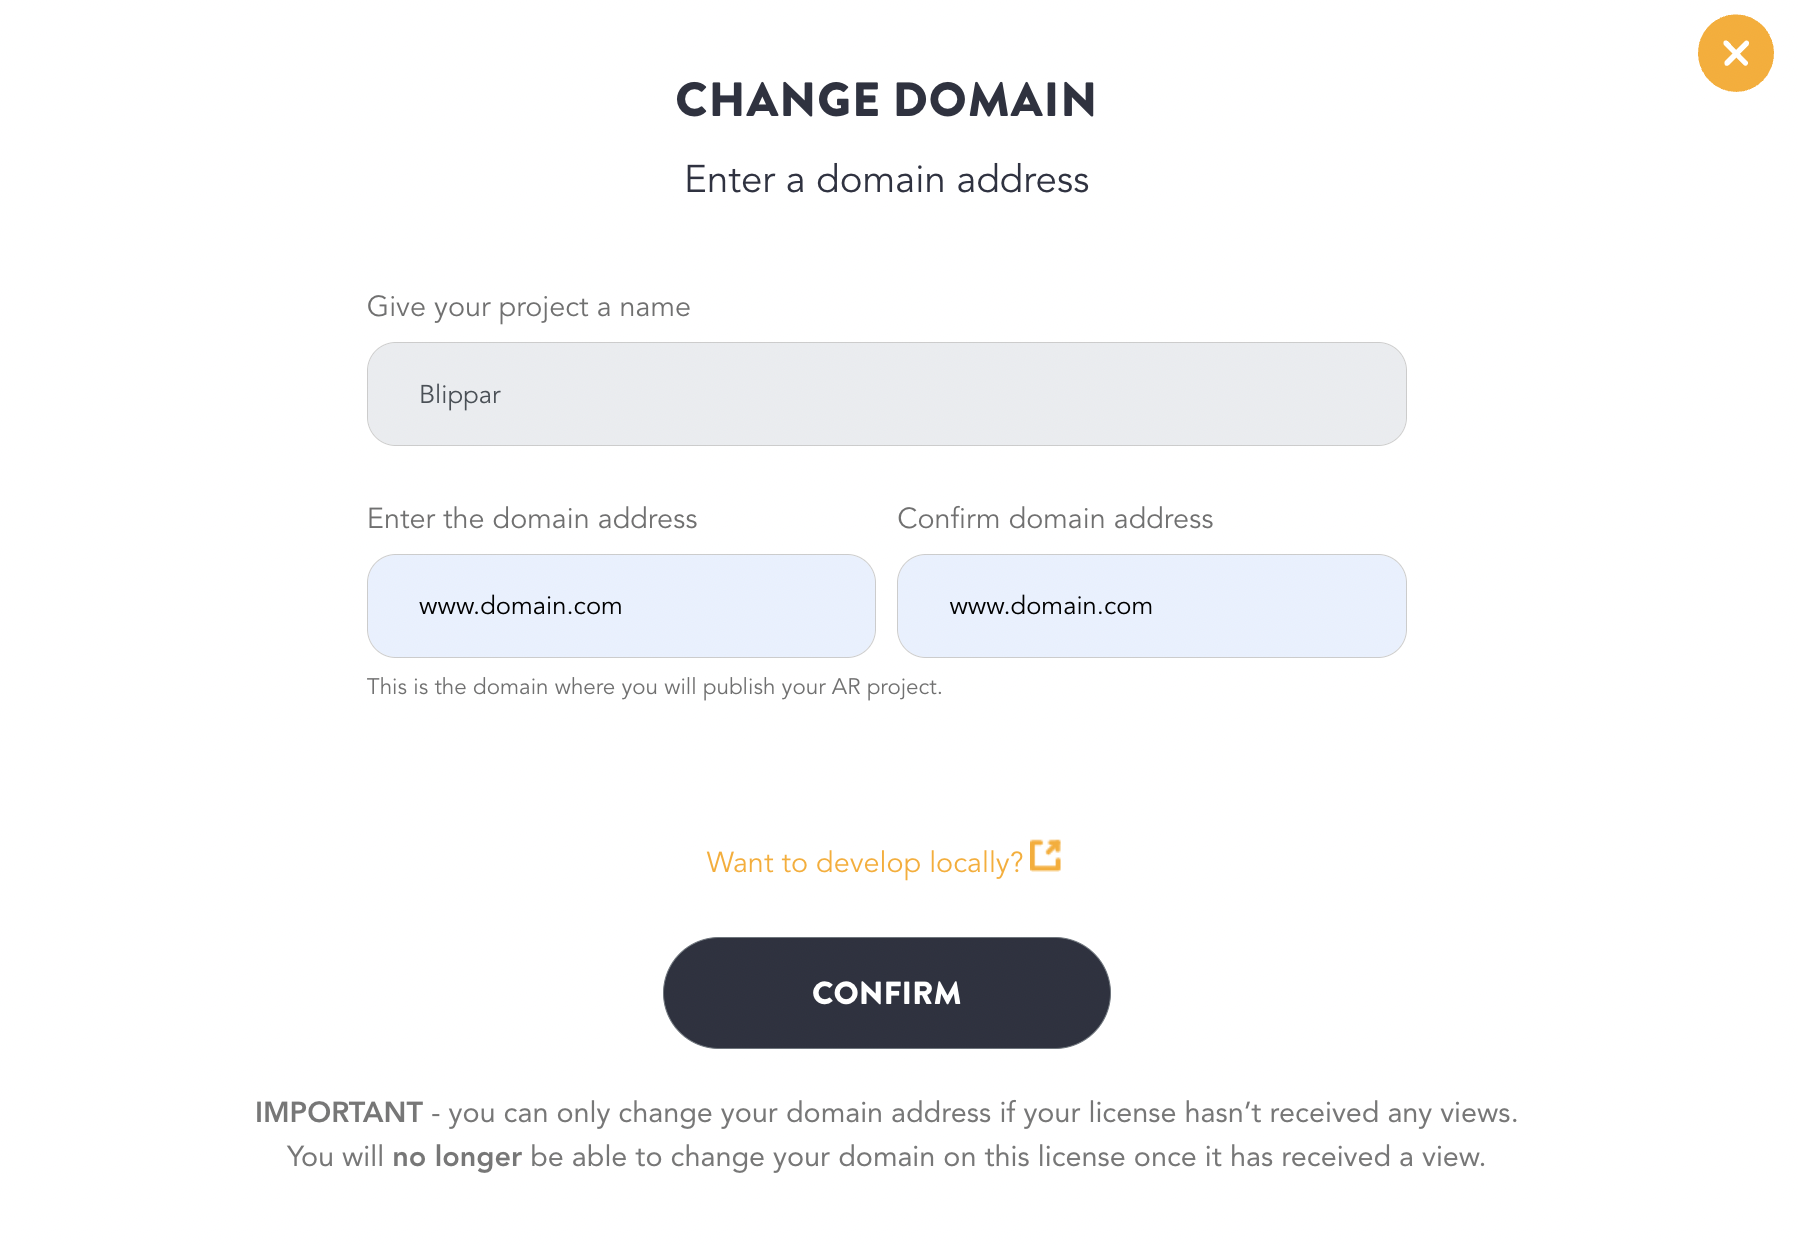
WebAR SDK allows you to change or update you domain before any views are utilised
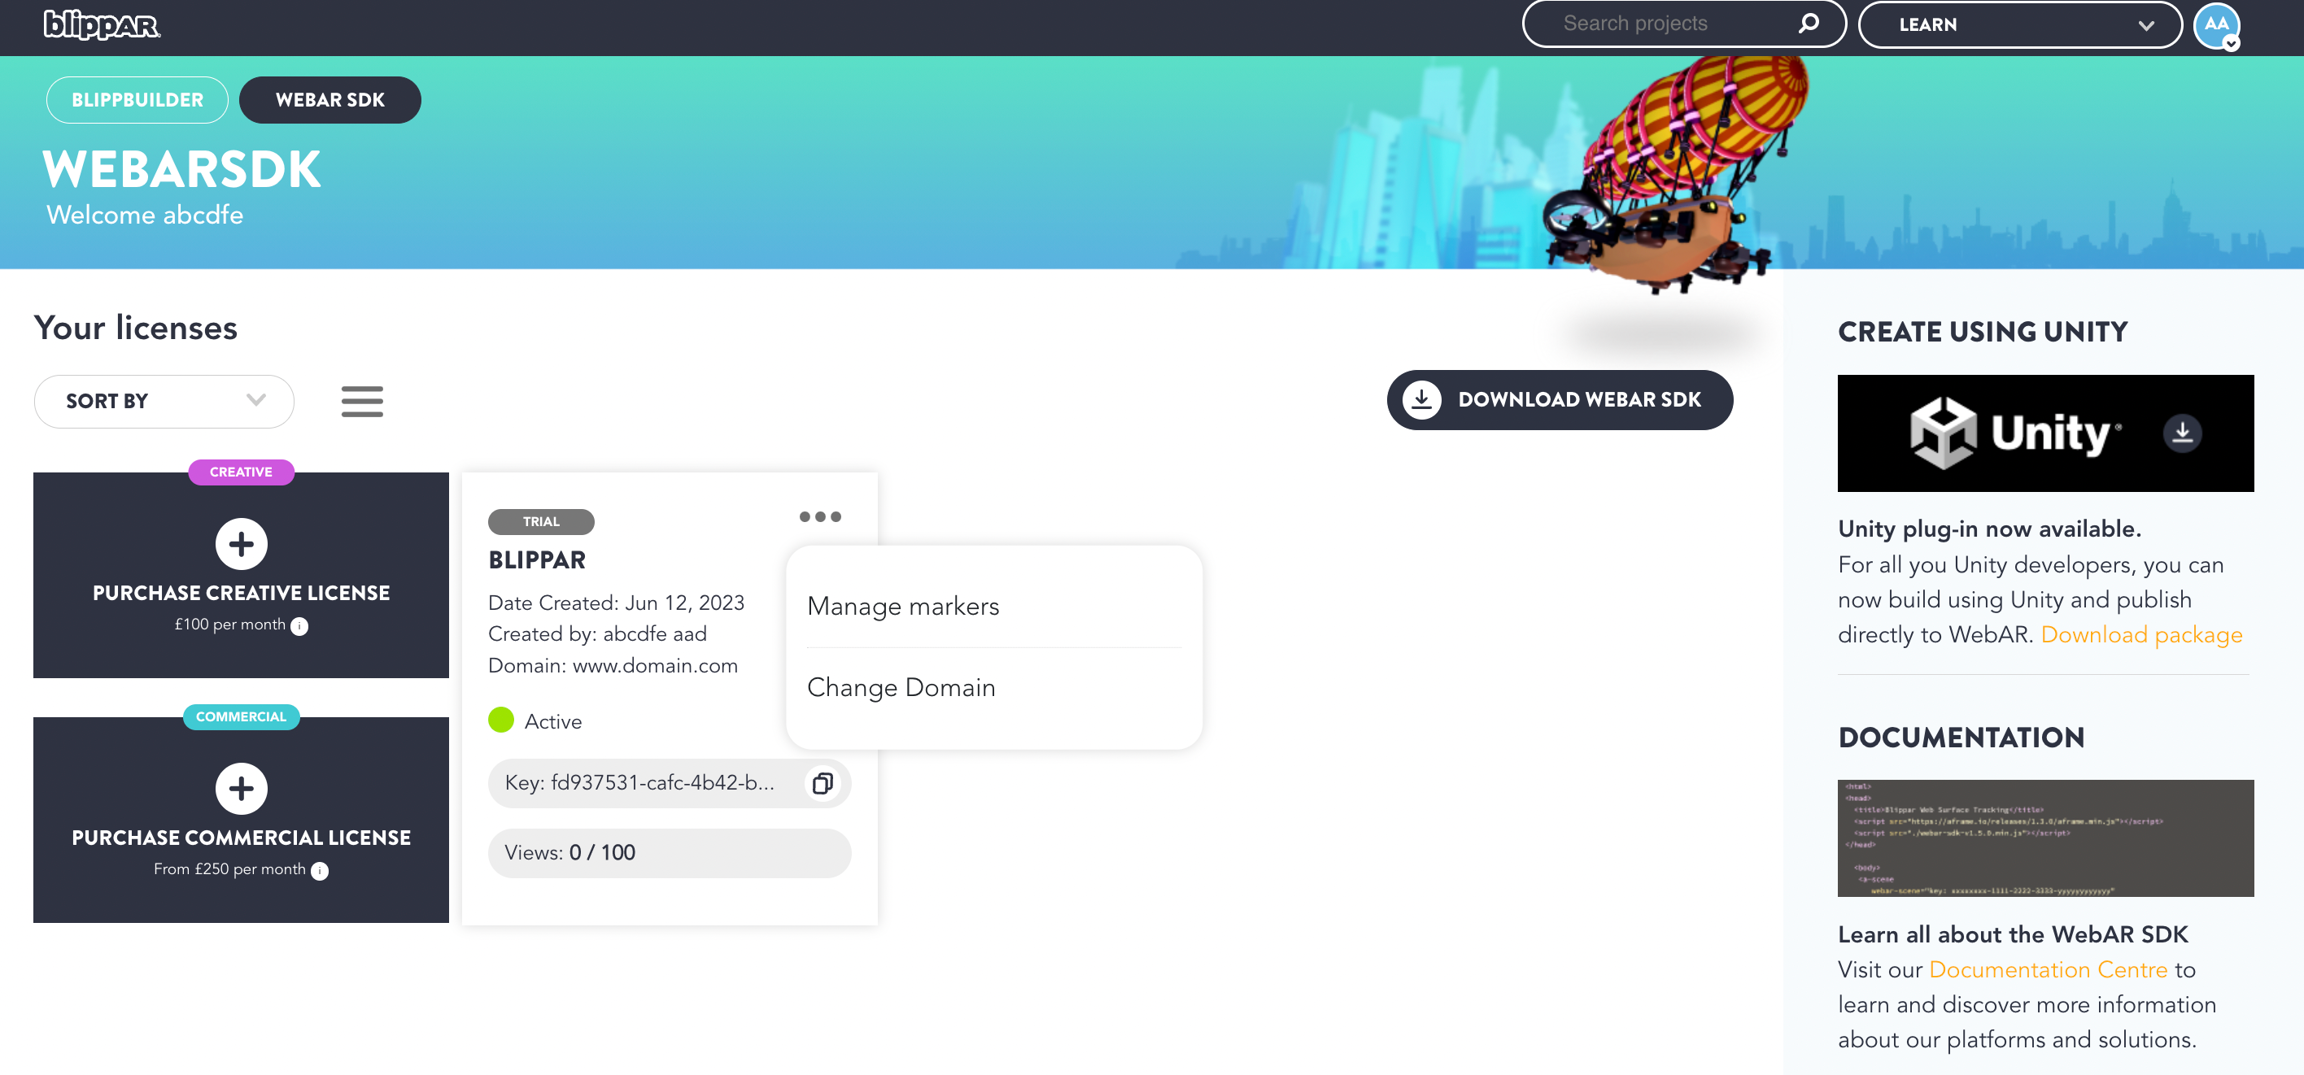
Click on the three-dots next to the license key and select 'Change Domain'
Provide the domain information and click 'Confirm'.
Add Markers and Manage Markers
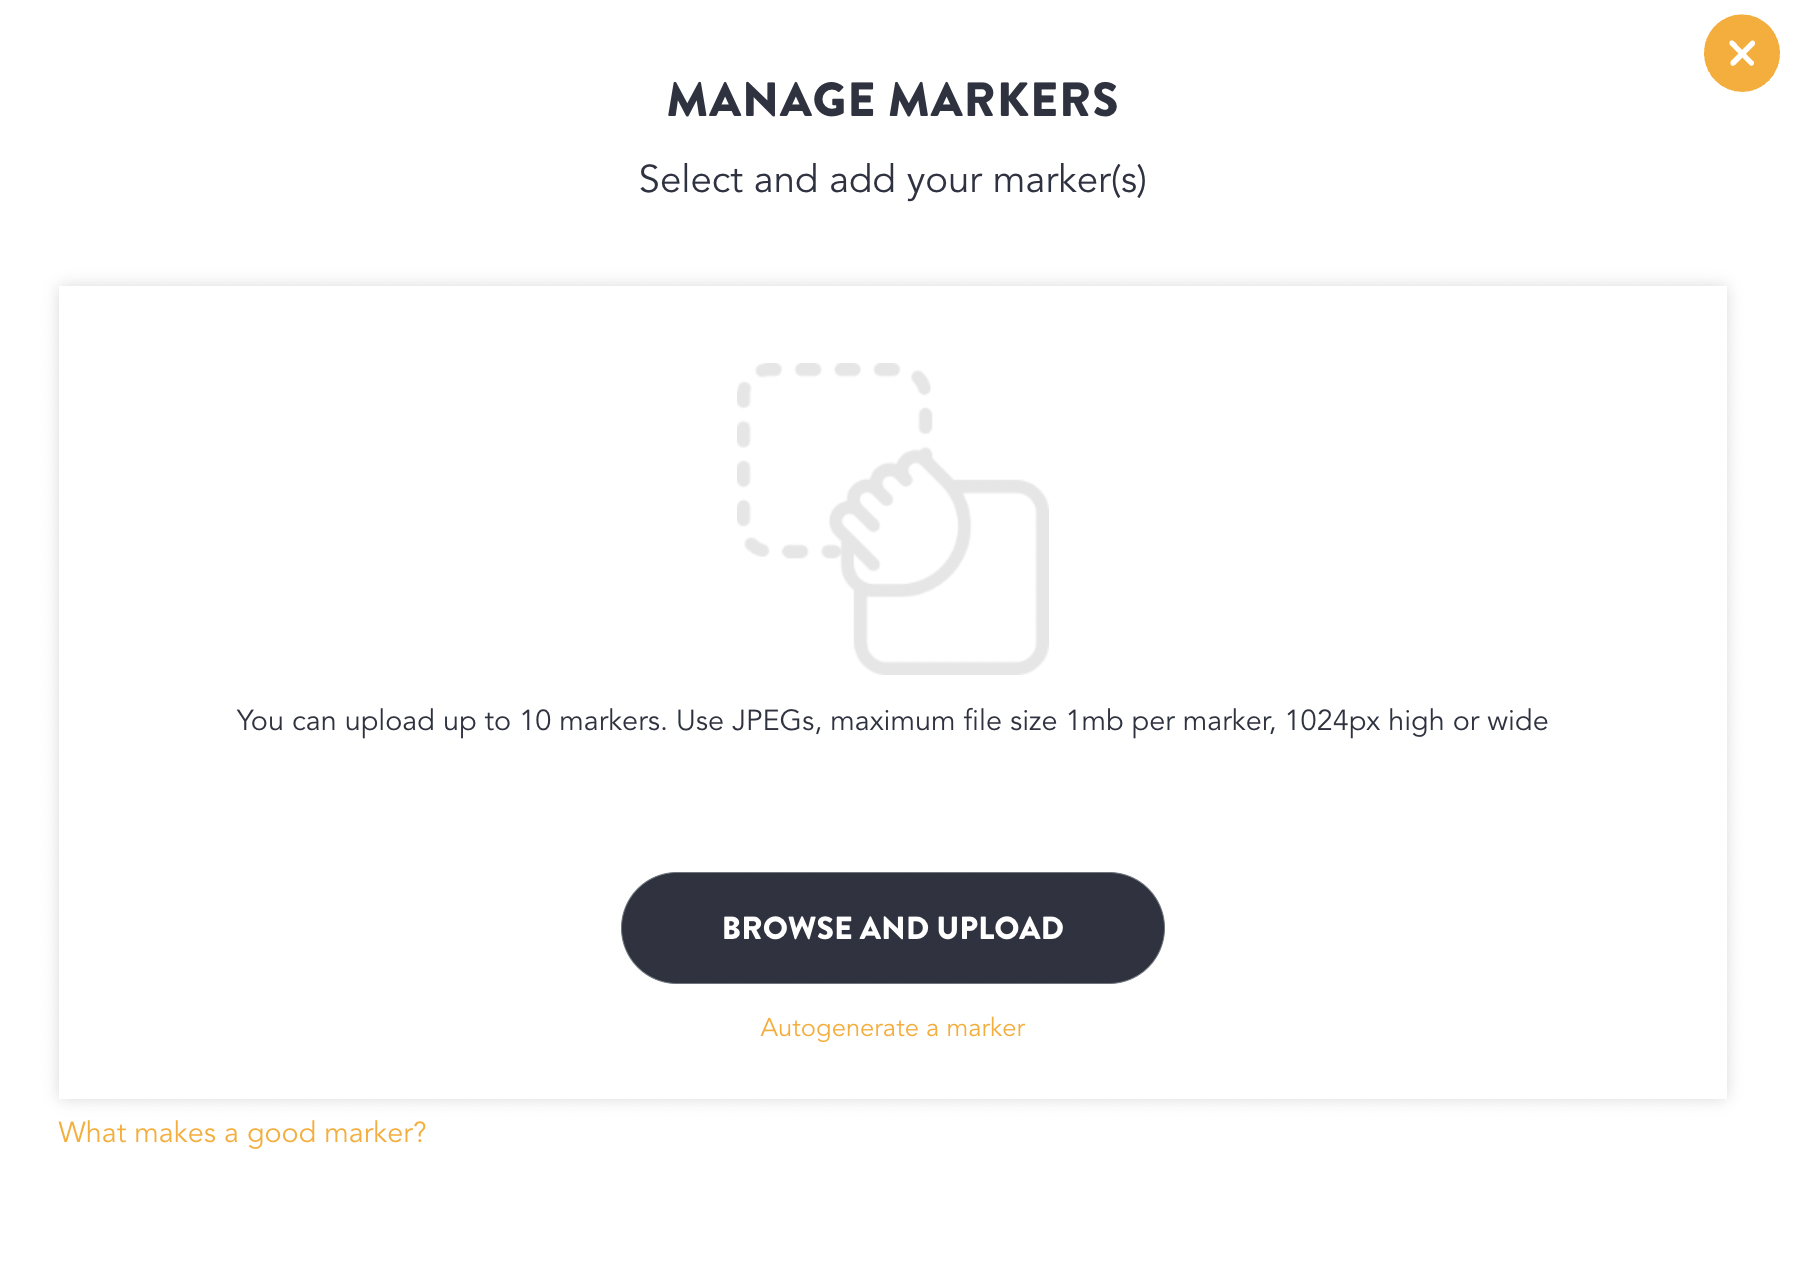
In order to create marker tracking experiences you can use the option to auto-generate a test marker or upload your own marker images.
Click on the three-dots next to the license key and select 'Add markers (image anchors)'

Click on 'Auto-generate' or 'Browse and Upload' makers
Click confirm
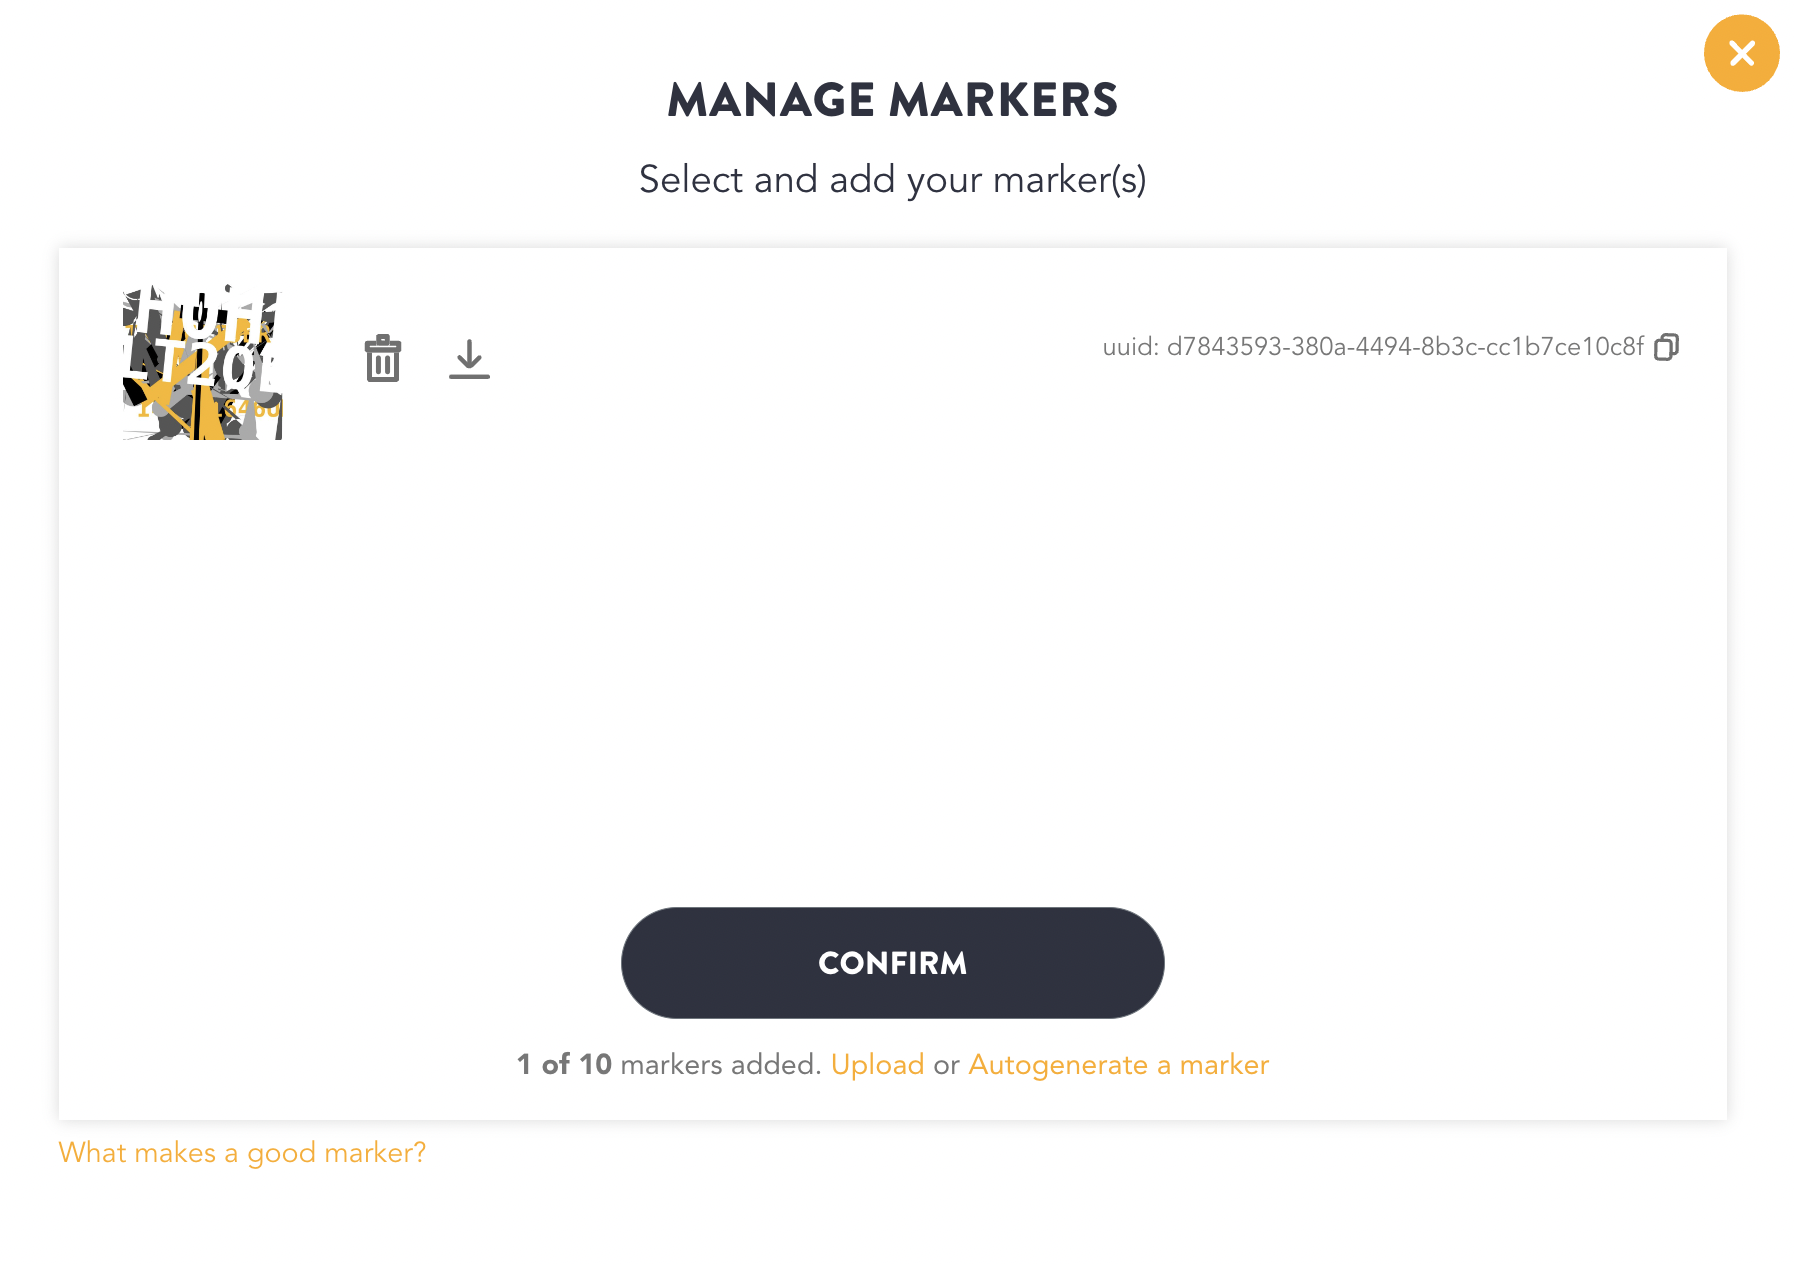
Your image anchor 'License Key' is generated. Utilize this key to update the marker ids while creating your AR experience in your editor.
If you want to add more markers you can navigate to HUB and chose option to 'Manage Markers'
Manage Profile
WebAR SDK allows you to 'Manage Licenses' .

Click the icon 'Use WebAR SDK' to and you will be redirected to 'Your Licenses' section
Navigate to your profile icon and in the drop-down choose 'Manage Profile.'

You can choose to update your profile information in this section
Click Save