Build a Basic Surface Tracking Experience
Construction of an AR experience using SLAM
Surface Tracking
Create a basic scene
To create a Surface tracking experience using WebAR SDK and Unity follow the below steps:
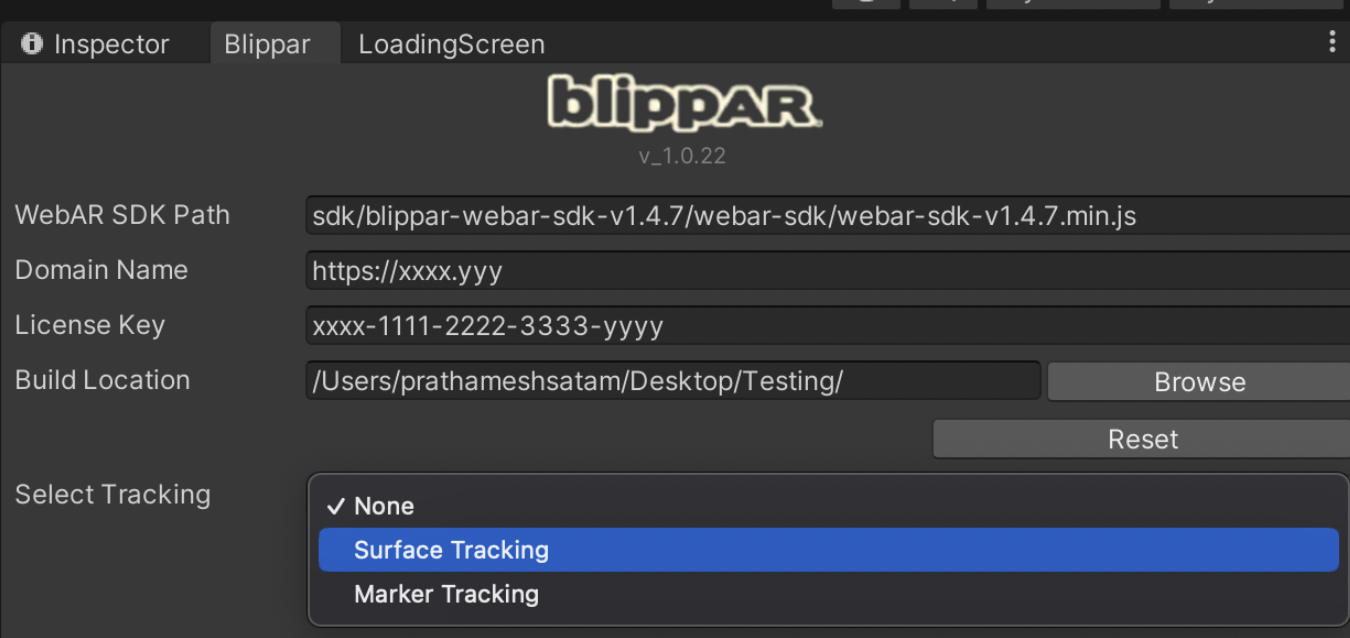
Navigate to the Blippar Inspector tab and select the option ‘Surface Tracking’ as shown below:

Certain new game objects such as webarStage, webarCamera and webarManager will be added under the SampleScene.
webarStage is the game object that is positioned at the origin of the tracked surface. Any 3D objects/assets placed under webarStage will be anchored and appear on the tracked surface.
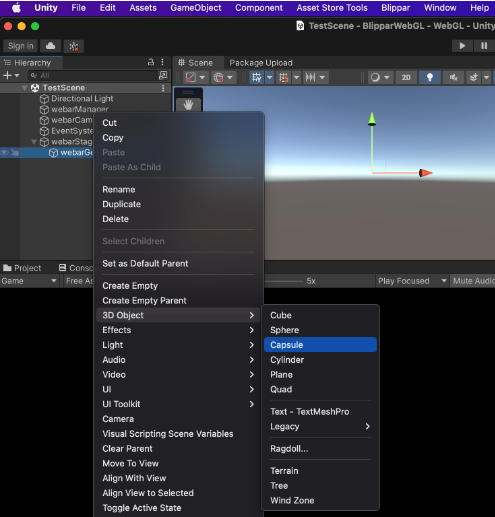
Right click on the webarStage object and add a Capsule 3D object for the example.
Delete the default "Main Camera" object from SampleScene.

Enable Tap And Place :
A visual cursor appears on the identified surface within the AR scene. To enable this option, define Tap And Place: true. Users can tap the screen to place the 3D model at the cursor's location, providing an intuitive way to control where the model appears in the physical environment.
Conversely, setting Tap And Place: false will hide the cursor, disabling this placement feature and the 3D model will appear on the surface after detection. To enable the tap and Place feature go the “Bilppar Settings” window and check the tap and place checkbox and assign the “webar plane” and “webar cursor” prefab from the Assets -> webarSDK -> Resources -> Prefabs folder. Users can also customize or assign new prefabs similar to the predefined prefabs. If user selects the 'Tap and place' feature the inspector window look like

Build Scene
In the Blippar Inspector tab, click Build to build the surface tracking web application.
Check Color space -> go to the the project settings -> Player -> other settings and check the color space if it is Linear then change it to the Gamma.
After the build is complete, a pop-up confirming the build completion will appear on the screen.
Once the build is complete, you can locate the built application under the unity project folder. Navigate to build location.
Host this folder in a HTTPS web server. For local testing, host it in a HTTPS web server having the desktop/laptop's IP address as the domain address.
For more details see this link on how to develop locally.
Open the URL in the mobile browser (Android Chrome or iOS Safari) to view the Surface Tracking experience.
Examples
Check out a few example AR experiences created using WebAR SDK Unity Package. Scan the QR code displayed on the screen to trigger the experience:
Last updated