Build a Basic Marker Tracking Experience
Construction of an AR experience using image or marker tracking
Marker Tracking
Create a basic scene
Create a basic scene from playground.babylonjs.com and download the source code by clicking the Download button.
Or you can download the already generated basic scene code from this link.
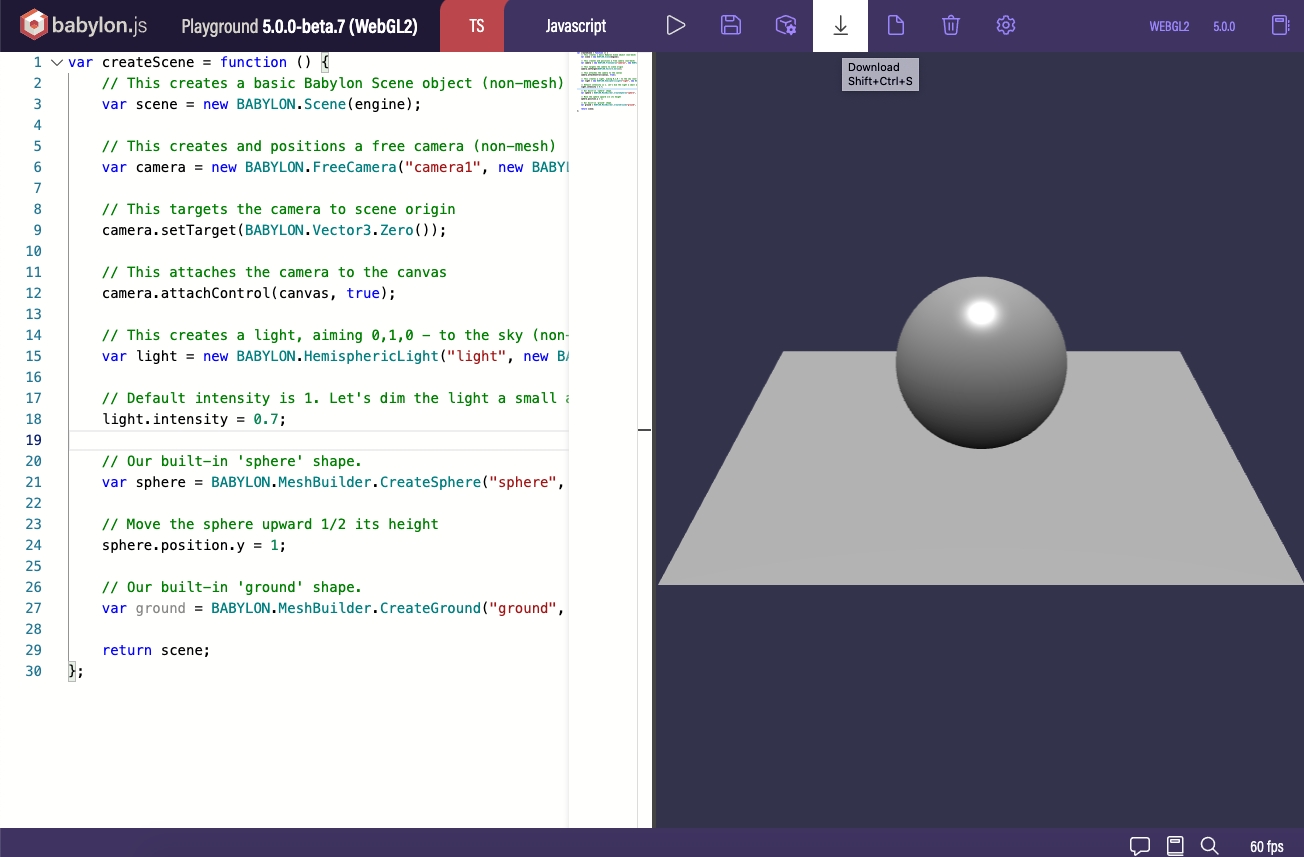
Unzip the downloaded code and open the index.html file a code editor of your choice.
This basic scene source code from Babylon.js playground has the code to create the babylon rendering engine and construct a scene with a Sphere and a ground plane model.
It also has many javascript libraries which are not necessary for this example. Hence delete all the script tags and include only the following Babylon.js scripts.
<!-- Babylon.js -->
<!-- Delete all the other scripts and add only the following scripts -->
<script src="https://cdn.babylonjs.com/babylon.js"></script>
<script src="https://cdn.babylonjs.com/loaders/babylonjs.loaders.min.js"></script>
This document is compatible with Babylon.js version 4.2.0.Delete these redundant lines from the playground generated code which are not necessary for webar experience.
```javascript
// This targets the camera to scene origin
camera.setTarget(BABYLON.Vector3.Zero());
// This attaches the camera to the canvas
camera.attachControl(canvas, true);
```Add WebAR SDK script
Add the webar sdk script tag with the following attributes
webar-mode="marker-tracking"
auto-start="true"
rendering-engine="babylonjs"
As a query parameter in the https url of webar sdk script, paste your license key obtained from Blippar hub which will be in the following form:
?license-key=xxxxxxxx-1111-2222-3333-yyyyyyyyyyyyMake sure this webar sdk script is added only after the babylonjs script has been added in the previous section.
<script src="https://webar-sdk.blippar.com/releases/1.4.3/webar-sdk-v2.0.3.min.js?license-key=xxxxxxxx-1111-2222-3333-yyyyyyyyyyyy"
  webar-mode="marker-tracking"
  auto-init="true"
  auto-start="true"
  rendering-engine="babylonjs">
</script>
Create webar marker mesh map array
A webar marker is an empty Babylon mesh object in the scene. Set this webar marker mesh object as the parent of the 3D objects that has to be displayed when scanning a physical marker image.
In the Blippar Hub you can upload up to 10 marker images. For each marker image a webar marker mesh has to be created and mapped with the marker image id obtained from Blippar hub (marked with red circle in the below picture). Please have a look at this article to know how to Add and Manage markers in Blippar hub and obtain a marker id.
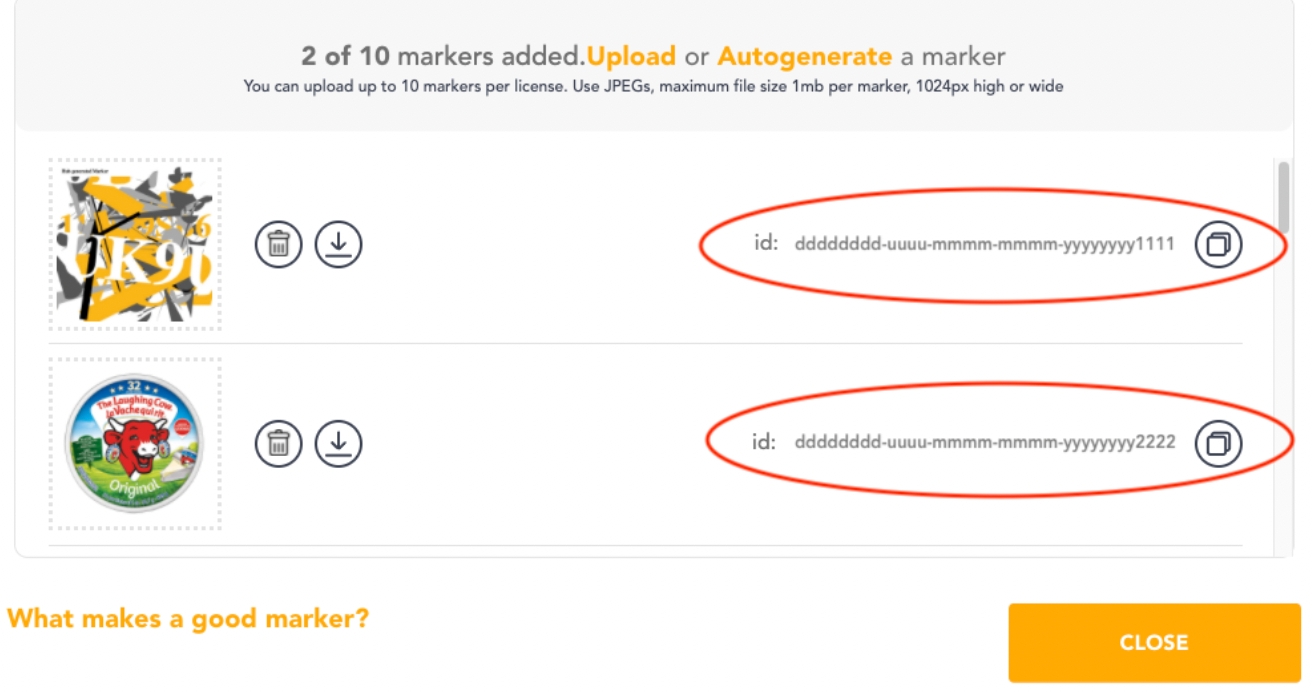
A webar marker mesh (e.g. markerMeshObject_1) is mapped with a marker image id (e.g. dddddddd-uuuu-mmmm-mmmm-yyyyyyyy1111) using the following javascript object structure:
{
  markerId   : "dddddddd-uuuu-mmmm-mmmm-yyyyyyyy1111",
  markerMesh : <markerMeshObject_1>
}
An array of such objects can be constructed to map multiple marker image ids with their corresponding marker mesh object. This array will be passed as an argument to WebAR SDK's InitBabylonJs API which will be used by the sdk to decide which object has to be displayed on which marker image when it is detected.
[
  {
    markerId   : "dddddddd-uuuu-mmmm-mmmm-yyyyyyyy1111",
    markerMesh : <markerMeshObject_1>
  },
  {
    markerId : "dddddddd-uuuu-mmmm-mmmm-yyyyyyyy2222",
    markerMesh : <markerMeshObject_2>
  }
]
In this example we use two marker images. Hence two webar marker mesh objects have to be created.
Under the createScene function:
First delete these lines of playground generated code which creates sphere and ground meshes.
// Our built-in 'sphere' shape.
var sphere = BABYLON.MeshBuilder.CreateSphere("sphere", {diameter: 2, segments: 32}, scene);

// Move the sphere upward 1/2 its height
sphere.position.y = 1;

// Our built-in 'ground' shape.
var ground = BABYLON.MeshBuilder.CreateGround("ground", {width: 6, height: 6}, scene);
Construct two webar mark mesh objects
// Create two empty meshes. Models/meshes appended as a children to this empty mesh will be displayed on the corresponding mapped marker.
 let webarMarkerMesh1 = new BABYLON.Mesh("webarMarkerMesh1", scene);
 let webarMarkerMesh2 = new BABYLON.Mesh("webarMarkerMesh2", scene);
Define an array webarMarkerMeshMap and push the map object containing the markerId and markerMesh values
var webarMarkerMeshMap = [];

webarMarkerMeshMap.push({ markerId: "dddddddd-uuuu-mmmm-mmmm-yyyyyyyy1111", markerMesh: webarMarkerMesh1 });
webarMarkerMeshMap.push({ markerId: "dddddddd-uuuu-mmmm-mmmm-yyyyyyyy2222", markerMesh: webarMarkerMesh2 });
Add a GLB model to the first marker mesh
Under the createScene function, import the GLB file MaterialsVariantsShoe.glb using Babylon SceneLoader and set webarMarkerMesh1 as the parent for the mesh nodes.
BABYLON.SceneLoader.ImportMesh(null, "./models/", "MaterialsVariantsShoe.glb", scene, function (meshes, particleSystems, skeletons) {
  let xQuat = new BABYLON.Quaternion();
  for (mesh of meshes) {
    if (mesh.name !== '__root__') {
      // Move the loaded models to webarMarkerMesh1
      mesh.setParent(webarMarkerMesh1);
      BABYLON.Quaternion.FromEulerAnglesToRef(Math.PI / 2, 0, 0, xQuat);
      mesh.rotationQuaternion.multiplyInPlace(xQuat);
      scaleByFactor(mesh, 6);
    }
  }
});
Add a GLB model to the second marker mesh
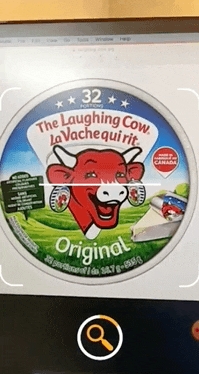
Similarly, import the GLB file milk_bottle_1l.glb using Babylon SceneLoader and set webarMarkerMesh2 as the parent for the mesh nodes.
BABYLON.SceneLoader.ImportMesh(['Object_4', 'Object_6'], "./models/", "milk_bottle_1l.glb", scene, function (meshes, particleSystems, skeletons) {
  for (mesh of meshes) {
    if (mesh.name !== '__root__') {
      // Move the loaded models to webarMarkerMesh2
      mesh.setParent(webarMarkerMesh2);
      mesh.position.y = -0.75;
      scaleByFactor(mesh, 5);
    }
  }
});
Initialise WebAR SDK
Under the createScene function, call the Webar SDK's InitBabylonJs API. Once the webar sdk script is loaded, its APIs can be accessed using the WEBARSDK global variable. Please refer to the API Reference documentation for more details.
// Pass babylon canvas, scene, camera and webarStage mesh to WebarSdk to initialize surface tracking
WEBARSDK.InitBabylonJs(canvas, scene, camera, webarMarkerMeshMap);
Deployment
Deploy your files (the HTML file and the blippar folder if you downloaded the SDK) to your web server.
Note:
You can also develop and host locally in Dev Mode, see more info here Develop Locally.
Your website must have https enabled, this is to enable the browser to access your camera.
Navigate to your page, the WebAR SDK should work with any modern browser but is extensively tested with Safari (iOS) and Chrome (android). If all has gone well you will see the following results below. Information about launching the AR experience is available here.
Full Source Code
Full source code of this WebAR SDK BabylonJS Marker Tracking example can be seen in the Github repository.
Resulting Marker Tracking Experience