Unity Screenshot Feature
Learn how to take screenshots of your experience using Unity
Introduction
Capturing screenshots in a Unity web application involves capturing the current state of the application's viewport and saving it as an image file. This can be useful for various purposes, such as sharing gameplay moments, creating documentation, or debugging. Below is a description of how to achieve screenshot capture in a Unity web application using blippar sdk:
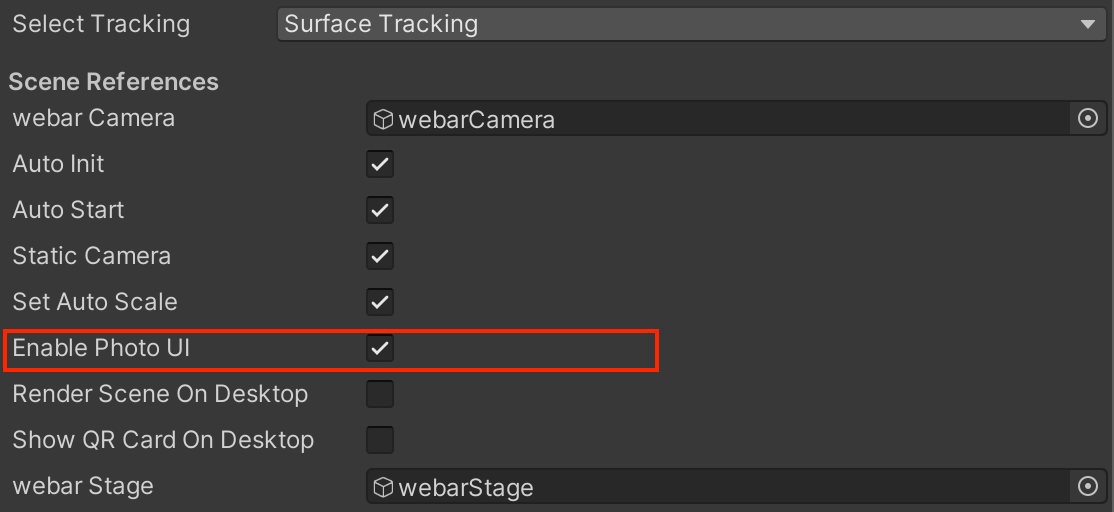
Enable UI button trough blippar settings
"Enable Photo UI" parameter allows you to show/hide the screenshot button state, to show the button just check the Enable Photo UI button and uncheck for hide.

Once you check the "Enable Photo UI" and build a project the bbutton will we visible in your experience

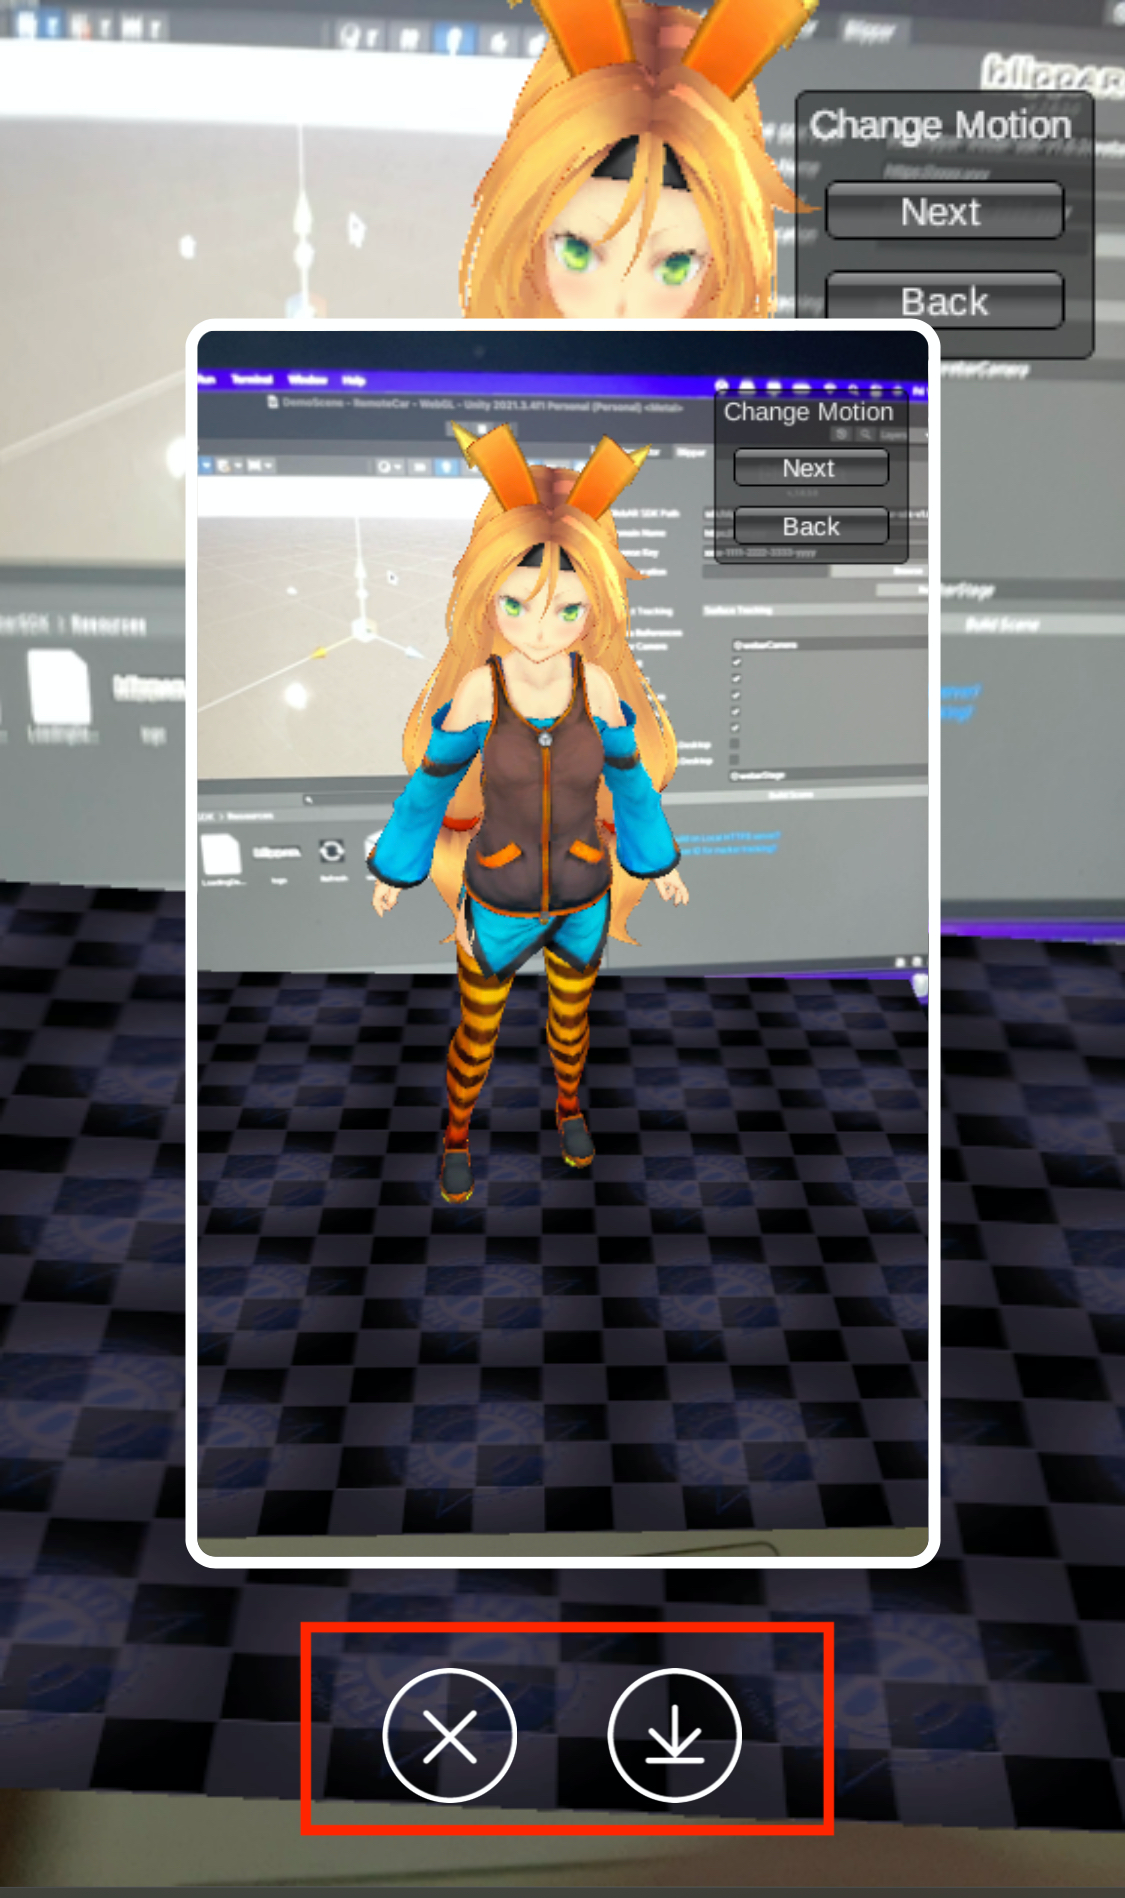
Screenshot Preview
A screenshot preview in a web application involves capturing a visual representation of the current state of the application's viewport and displaying it as a preview within the application's user interface. This feature allows users to quickly see a snapshot of the scene they are interacting. The UI provides two options in preview window, delete and download
Delete Screenshot
Download Screebshot

Take screenshot programmatically
Taking screenshots programmatically in a Unity application allows you to capture the current state of the game or application.
Uncheck the "Enable Photo UI" from inspector window.
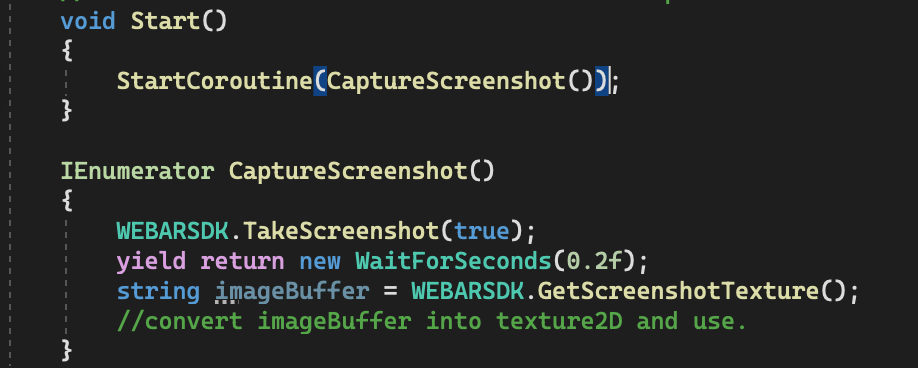
Write a script to cature screenshot and call a method "WEBARSDK.TakeScreenshot(returnBuffer)"
"returnBuffer" is a boolean value if returnBuffer->false a preview UI with download button is displayed on the screen.
and if "returnBuffer" is true the "WEBARSDK.TakeScreenshot" method converts the screenshot image data in binary format and to access this data user needs to call a method "WEBARSDK.GetScreenshotTexture" after some delay.
"WEBARSDK.GetScreenshotTexture" will return a image data in base64 string format, using this string user can convert or use it anywhere according to the use case.
