Build a Basic Surface Tracking Experience
Construction of an AR experience using SLAM
Introduction
This guide walks you through the construction of a basic scene built using A-Frame and the WebAR SDK. The output will be a 3D Astronaut model fixed to the identified surface (see here)
To simply display 3D models no knowledge of A-Frame beyond what's outlined below is necessary. However if you want to make more advanced experiences, familiarity with A-Frame will be very helpful. You can find out more about A-Frame in their excellent documentation.
Process
Complete the below mentioned steps to create and launch an AR experience using Blippar WebAR SDK and A-frame integration
Step:1 Create an HTML File & Include the WebAR SDK
Create an HTML document in your favourite editor.
Include AFrame Script before WebAR SDK.
To include the WebAR SDK in this, we drop in a <script> tag under the <head> tag pointing to the WebAR SDK.
The exact form of the below will look different depending on how you installed the WebAR SDK. The example which follows assumes you downloaded the WebAR SDK and extracted it so that the script file - webar-sdk.min.js and libs folder is in the same location as your HTML file. Follow the instructions in the Install section to find the right tag for your setup.
Also a model's folder containing a test GLB model file is assumed to be in the same location as your HTML file. To begin with this example, use this GLB model in this link for testing.
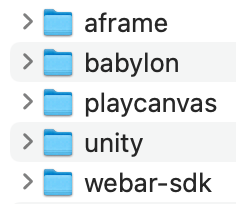
The final folder structure should look like this:

From Webar SDK v1.1.0-beta and above, A-frame script has to be included separately
Supports A-frame version 1.3.0
Step 2: Create a WebAR Scene
The webar-scene is the WebAR version of A-Frame's scene entity, and functions in much the same way.
To turn a normal scene entity into a WebAR Scene we add an A-Frame <a-scene> and add a few specific components.
Most importantly we add the webar-scene component and set the key: property to the license key you got when you created the project (see here for instructions)
The other components will just make sure everything is setup correctly.
Remember to change the key value or you will receive an "invalid key" error when you deploy.
Step 3: Add a WebAR Camera
The webar-camera is, like the webar-scene, the WebAR version of A-Frame's camera entity
Within the <a-scene> entity add an A-Frame <a-camera> entity and give it a webar-camera component.
Step 4: Load your 3D Assets
To ensure the models are fully loaded before the experience starts so we provide the best user experience, we use A-Frame's Asset Management System
Add an <a-assets> entity and load any model files to be used as <a-asset-item> entities. Included with the downloaded WebAR SDK is a model of an astronaut to use as an example.
Step 5: Add a WebAR Stage
Next we add a webar-stage entity, this will be the parent to all the 3D models and represents the tracked surface. Any models placed onto the webar-stage will be displayed on the tracked surface. This is where all the action happens.
Within the <a-scene> entity add an A-Frame <a-entity> entity and give it a webar-stage component:
A 3D model placed under a webAR stage will be displayed on a detected surface.
Step 6 : Integrate Enhanced UX with Stage Cursor, Rotation, and Scaling
This step is mandatory to ensure a fully interactive AR experience. Integrate a cursor to allow users to place the AR model precisely by tapping on the screen. This step also introduces gesture-based interactions such as rotation and scaling, making the scene more engaging. This involves using the webar-ux-control component, which should be a child of the webar-stage entity.
Add the
webar-ux-controlentity: Insert an<a-entity>with thewebar-ux-controlcomponent as a child of<a-entity webar-stage>. SetstageCursorUX: trueto enable the stage cursor, and useuserGestureRotation: trueanduserGestureScale: trueto allow users to rotate the model by swiping and scale the model by pinching.
Understanding the Stage Cursor: With
stageCursorUX: true, a visual cursor appears on the identified surface within the AR scene. Users can tap the screen to place the 3D model at the cursor's location, providing an intuitive way to control where the model appears in the physical environment. Conversely, settingstageCursorUX: falsewill hide the cursor, disabling this placement featureIntegrate Gesture-Based Interaction: As with the
userGestureRotationanduserGestureScaleattributes, users can interact with the model by rotating it with a swipe or scaling it with a pinch gesture, offering a more interactive AR experience.
Step 7: Add a 3D Model
To the webar-stage we add our preloaded model.
Specify the glb model files to be loaded in A-Frame’s <a-assets><a-asset-item> tag. For more details, please refer to A-FRame’s Asset Management System document.
Add the 3d model asset <a-entity gltf-model=”#astronaut”> under the parent <a-entity webar-stage> element.
Also add the webar-loadmonitor attribute to the entities to display the loading progress screen before starting the surface tracking. See the webar-loadmonitor properties table for more details.
Full Source Code
In case we lost you along the way, here is the whole thing:
Deployment
Deploy your files (the HTML file and if you downloaded the SDK the blippar folder) to your web server, (note you can also develop and host locally in Dev Mode, see more info here Develop Locally.)
Your website must have https enabled, this is to enable the browser to access your camera.
Launching the Experience
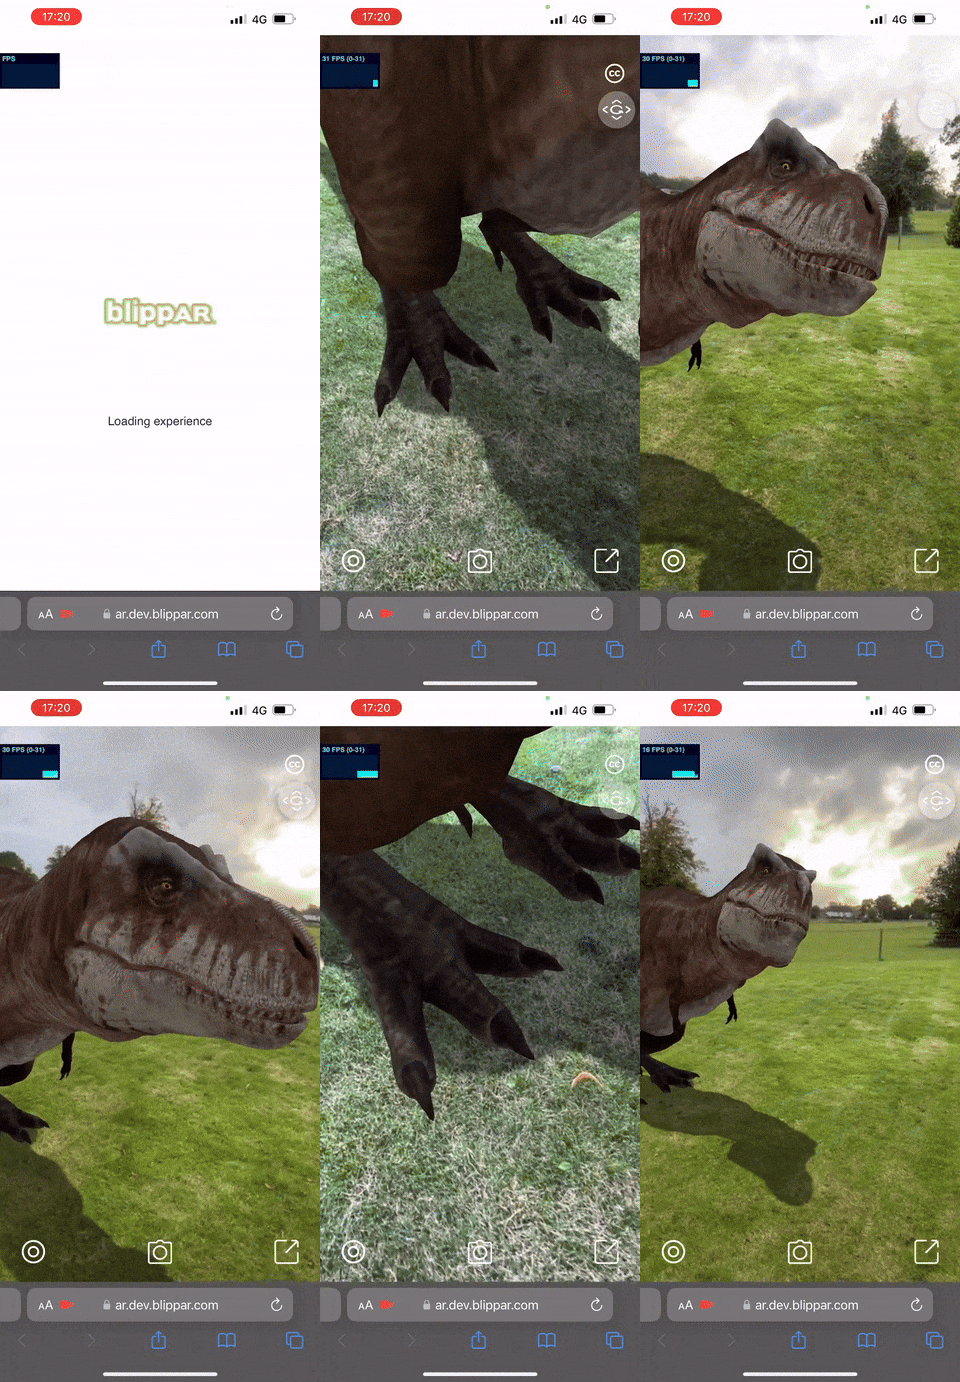
Navigate to your page, the WebAR SDK should work with any modern browser but is extensively tested with Safari (iOS) and Chrome (android). If all has gone well you will see the below. Information about launching the AR experience is available here.
Resulting Surface Tracking Experience
